Introduction
I have looked forward to writing this review for a long time now. I have followed the developers of Imerso from the very start and have seen their determination to break through challenges on their way. They have now reached a milestone and starts selling their software and their vision to architects, contractors and building consultants. It’s the start of an exciting new chapter for them and I’m very happy to share their work with you.
So be warned, I cannot be entirely objective on this review. I have tested their product for more than a year and have been giving the team my advice and feedback along their way. I want to share my impressions with you nonetheless, as I believe you will not want to miss this.
Why should you care about Imerso?
We are seeing a rapid change within technology in almost any professions, and luckily architecture and construction is no exception. I believe that we are on the verge of a big shift in the way we will be working with in the coming years, and that this will impact us one way or another before we know it.
As I talked briefly in my previous post, the need to get new tools for working with reality capture is vital to fully harvest its benefits. Traditional reality capture has relied on laser equipment or photogrammetry methods, which is becoming evermore available, but in general neither of these has been something architects had the knowledge or equipment to do themselves in their daily work. That is a huge lost opportunity, since we as architects rely on reality to create our designs, and so we need efficient solutions for capturing reality first.
What I want and need as an architect is an affordable, easy-to-use, accurate, and fast way of capturing reality. I want to supplement my control measurements and on-site photos with 3D field-data, so that I can sketch design layouts rapidly and efficiently, while preserving the real-life context and visuals over my models. I want to be able to document on-site work, as a project progresses, without having to take thousands of photos or manual checks
That’s a lot to ask for. To make this work, the success criteria is brutal. A solution must be intuitive to use, relatively cheap, have decent accuracy, needs to work fast, and be robust to all kinds of users and on-site conditions.
Introducing Imerso
Imerso is a 3D scanning software for mobile devices built by a young computer-vision team based in Oslo, Norway. In this post, I’ll be describing two factors of their work: the software they built and hardware you need to use it.
Hardware -Google Tango
For using Imerso, you must have a phone or a tablet that supports the Google Tango technology. This augmented reality platform was introduced by Google in 2014 and launched commercially earlier this year.It is basically a normal android device with additional kinds of embedded sensors and computing power, that lets software developers create new types of applications.

There are currently two devices available with this technology, the Lenovo Phab2PRO and the Asus ZenFoneAR (launching in summer). I have been using the Lenovo Phab2PRO (ca. $400) during my testing of Imerso. So, the technology is obviously not supported by Apple and that may be a turn-off for many architects. But that should not be a show-stopper from starting to use Imerso and improve your company’s work. Imerso’s team will help you get the devices you need to get started in days, and can also send you one as part of your subscription, for your team to use.
Software -Imerso App
Given this minimal investment in equipment, it is the scanning software and the workflow around it that makes Imerso want to improve. Their app is intuitive and quick to get the hang of. The team is constantly improving the interface and functionality without making it too complex or making to many compromises. That is a fine balance to keep, but in my opinion they have found a pretty sweet spot.


Software -Web plattform
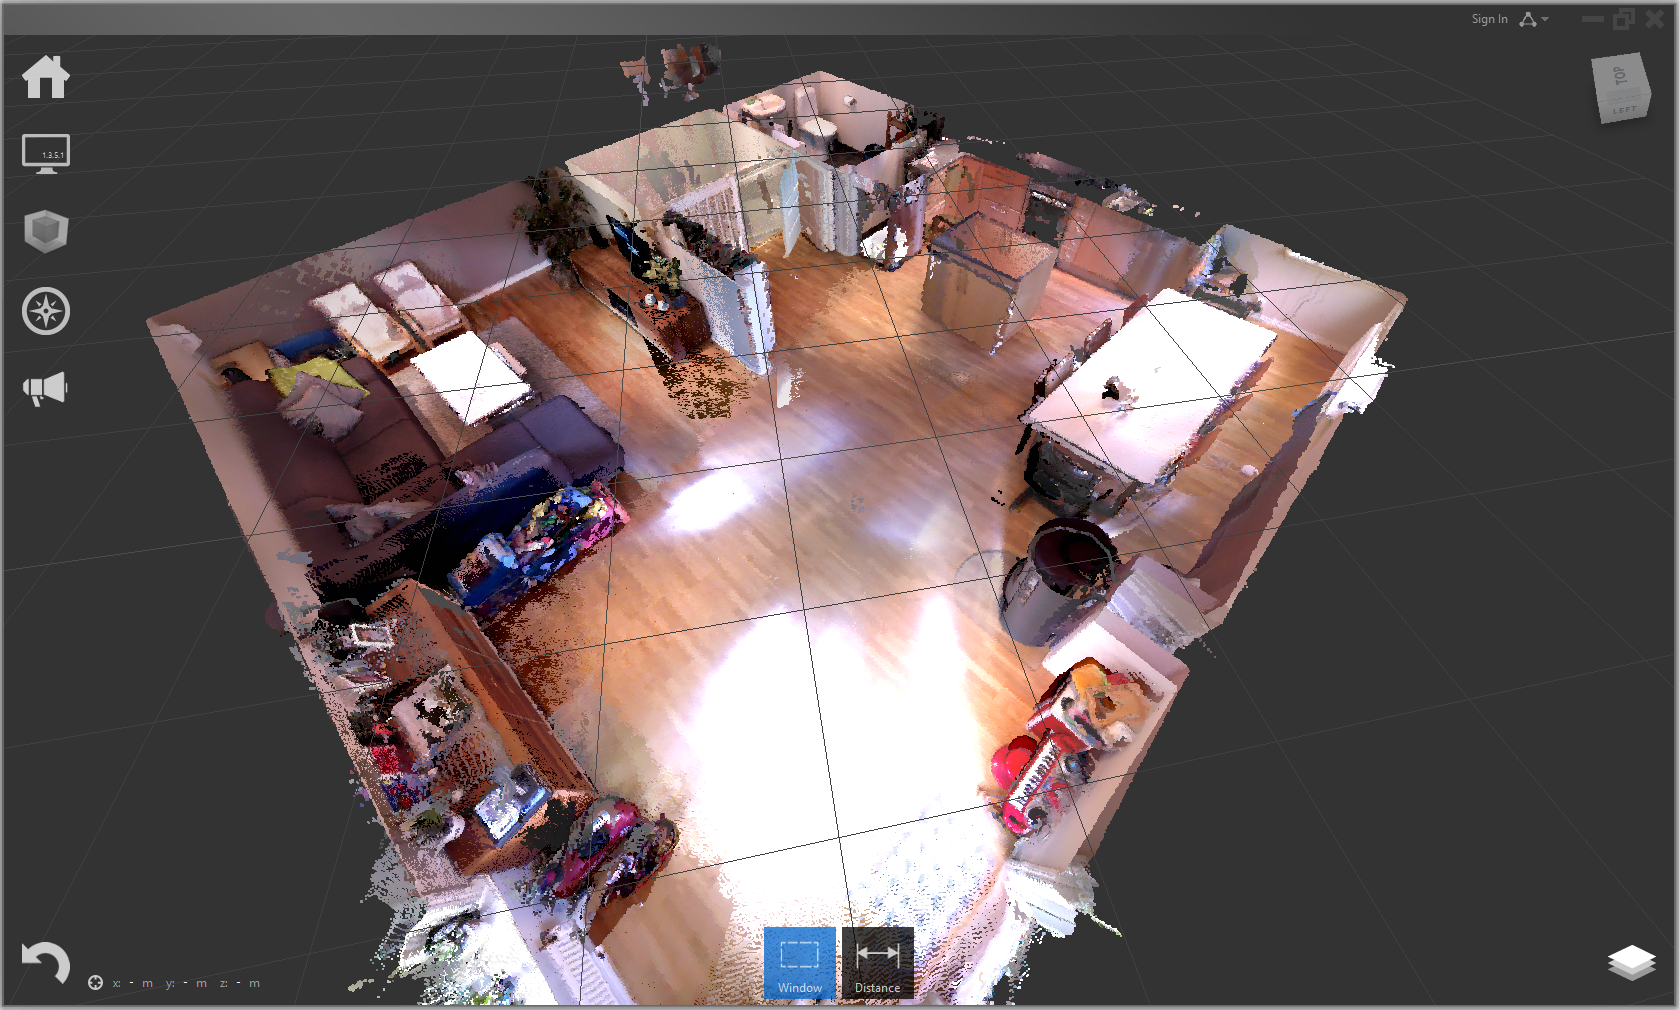
After making your scans, you upload them from your phone into Imerso’s web platform. You can access your data from anywhere using a browser, to view the results in the online viewer and quickly take measurements inside the scan. From here you can export the the 3D model to a pointcloud and/or as a mesh that you could open in your preferable design-software.


How does it work
Scanning
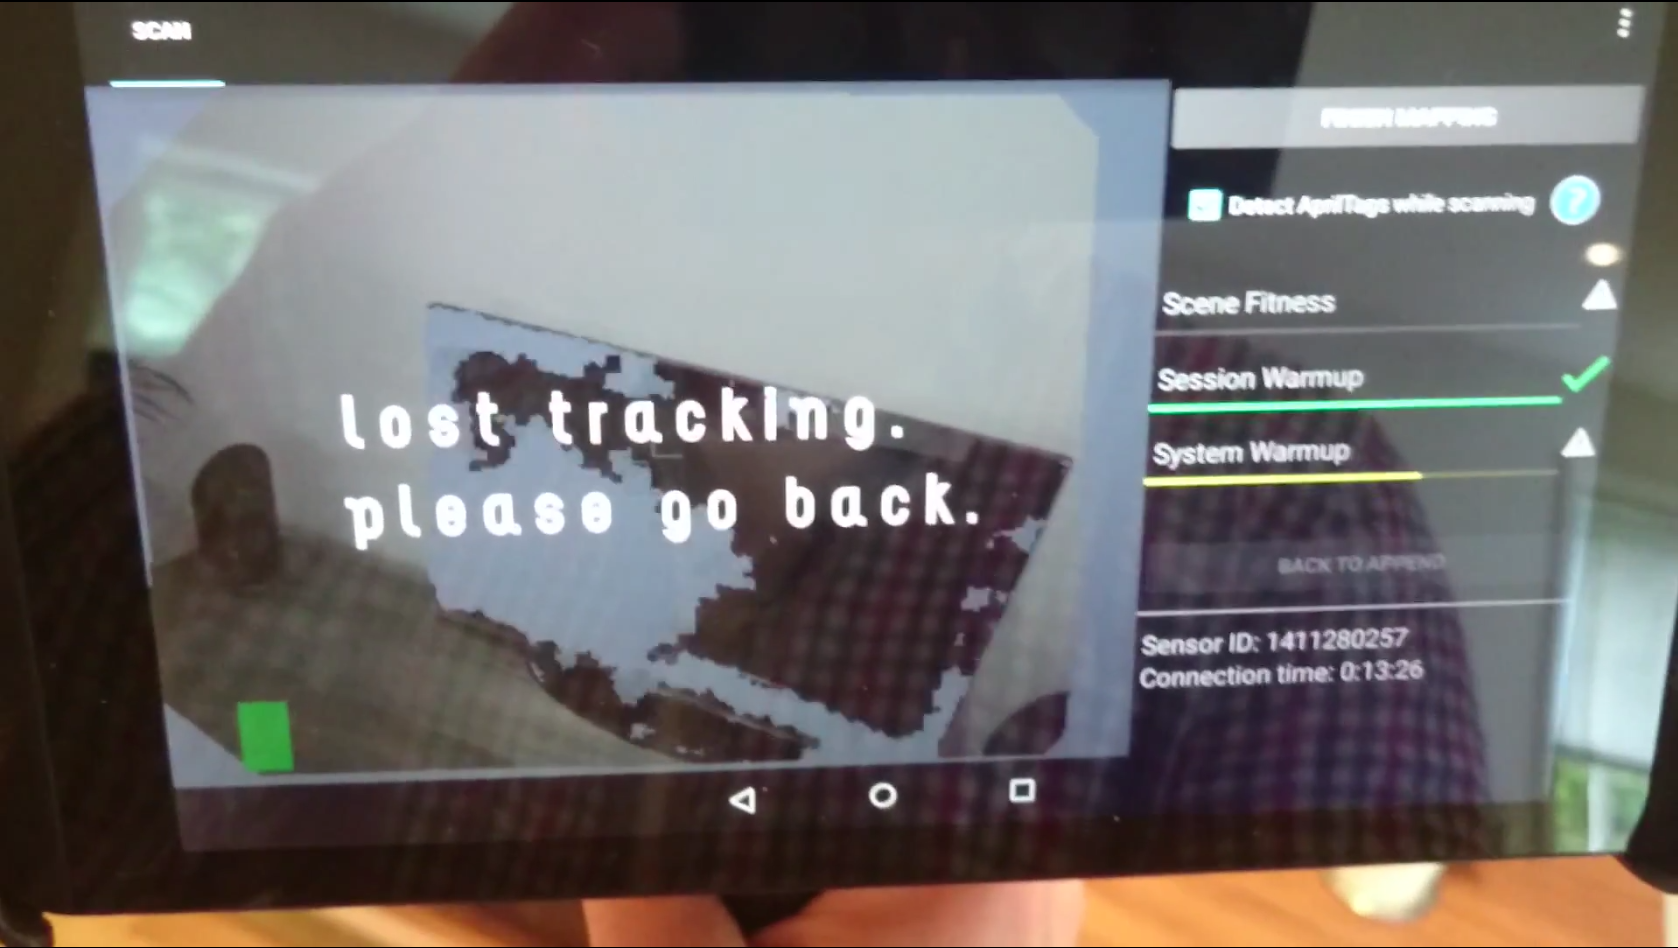
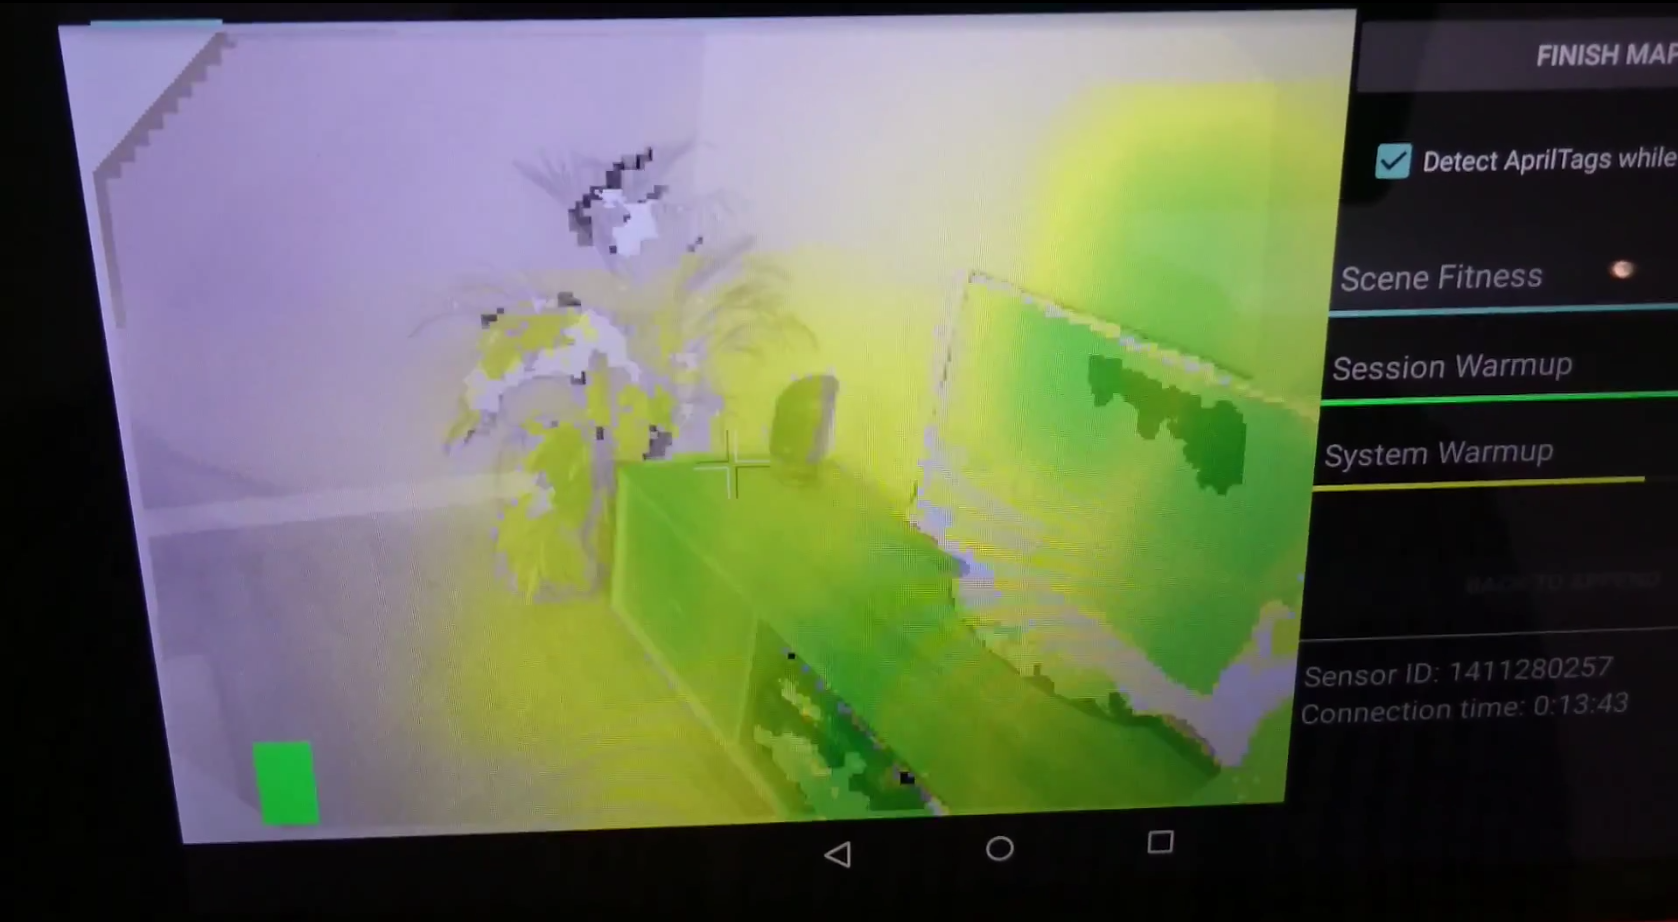
Let’s say you want to scan a room or apartment for designing elements over it on Revit. You do that by launching Imerso’s app and pointing your phone to the walls/ceiling/floor that you want to capture, just like you are filming them. You press the “Start” button to begin scanning, and the app shows you the 3D reconstruction being built in real-time as you move through that space. All you have to do is “fill the blanks” as you move and build up your model.
It is hard to explain this part, but it is intuitive when you try it. It’s very fun and easy to use, but having said that, there are definitely some tricks and tips to ensure great results and that comes with practice.
Here are some of the tips I’ve learned to have a great scanning results with Imerso:
- Avoid too sudden movements. Imerso let’s you move rather fast while scanning, but you should still try to move your phone smoothly and not shake it too much. It also helps if you consider your trajectory and what you want to capture before starting to scan.
- Don’t run the optimization tool right after saving each scan. The app does not let you make new scans while the optimization is running on another scan. Therefore, my workflow is to first make all the scans I need, and then run the optimization later on all the scans at once.
- The real-life coloring of the scan is generated by the camera of the phone. Therefore you should avoid covering the sensors with your hand, or scanning directly against strong lights or very dark spaces since this will affect the results. If you see that parts of the mesh are getting different exposures during scan, you can simply point the device at that area again while scanning to get better color. Either way, when you optimize your scan afterwards it will look much better than what you see during real-time scanning.
- I usually scan in portrait mode, but you should avoid hitting the physical power button on the side. This is more Lenovo’s design, than Imerso, but it is easy to accidentally hit the power button and lock the screen, forcing you to re-start your scan.
- Be sure that you have enough storage space before you start to scan. Imerso will give you a warning if your storage is getting full, but to avoid frustration when you are on-site, be sure to have available storage by uploading scans to the webapp and/or deleting old scans from the app
- For capturing a large area or an entire apartment, I break it down into sections and scan each part at a time. To make it easy to puzzle the pieces together later in Revit
Using Imerso shouldn’t keep you from taking photos and control measurements. It is often a good idea to bring with you a laser pointer and take a few control measurements to check tolerances and do fine adjustments in your designs over the scans.
Limitations
Of course, there are limitations with this device. It is just a regular phone with some extra sensors. So if you compare this phone with a traditional scanner, you are comparing apples and bananas.
The most obvious limitation is the relation between accuracy and the size of the scan. The larger the area you scan in one go, the more inaccuracies you will accumulate in your scan. You can still make large scans for the purpose of context, visuals, and FDV documentation, but Imerso will give you a notification to stop scanning at about the 50-80m2 size, after which you can start another scan and keep going.
In my experience, comparing control measurements against measurements within Imerso’s scans has given me a +-1% accuracy. This means that for scans of areas within the recommended size for a single scan, the precision is quite good to work with. If you capture areas beyond this size in a single scan, measuring smaller things will still give you an accurate result, but measuring longer distances will results in less accurate measure. You should therefore take this into consideration when modeling over the scans in your designs. As I got used to the app, I became more and more comfortable with this and learned what to expect according to the scans I make.
Nonetheless, when the area you want to scan is quite big, you should break it down into sections and make separate scans. You can puzzle them together later in Revit. I also take control measurements with the laser pointer to do a quality control, which helps me do fine adjustments when putting scans together, particularly of areas where I care most for accuracy.
In addition, you have the limitation of the scanning distance from the phone. It is about 4 meters, but it depends on the surface/material that you are scanning.
The Imerso’s app is primarily designed for indoors use. You can also scan outdoors, but too much direct sunlight will flood the infra-red sensors and affect the quality of your scan. Shadowed places, early/late hours, and cloudy days are perfect for outdoors scanning.
Functionality that is on the wish list is an “append” function. What I mean is that I could do multiple different scans, and they align correctly to each other. That was a neat functionality with the DPI-8 two years ago. The Imerso team is about to implement this functionality as we speak so stay tuned.
Wrap up
Exactly two years ago I wrote about the handheld scanner DPI-8. With the DPI-8 I got the feeling that the device was still in beta stage, but my experience with the scanner was still an eye-opener. I suddenly got an understanding how this technology will affect the way we will work in the future.
Then I tried the Faro Freestyle scanner half a year later. I saw then that the product segment had matured since it had better details, accuracy and tracking. But that was only true if the scan was less than 8m3. If you exceeded this, it became more inaccurate. In some cases, that is OK, but with a price-tag then at 120.000 NOK for the X version it was not that tempting. That was one and a half year ago.
And now technology like Google Tango and others, and products like Imerso and Matterport, have drastically started to lower the entrance level both regarding price and complexity. That is indeed promising.
My vision is that architects should manage to capture reality themselves when they are on the job-site, but the success criteria for this, as I have mentioned is quite high. Depending on the project, Imerso can make a huge difference in your work.
In my opinion, these technologies open a lot of opportunities to be more efficient, deliver better service, and keep your projects on track. There is a huge potential to start using these new methods early and build expertise, as they will definitely become an intrinsic part of our industry.
After all, we are living in reality and building on it. Let’s start using reality in our digital work as well.