I have really been puzzled about how Revit are defining direction of a CWpanel. Yes, when you have a CW the direction is easy. Up is up, and down is down. But what about glazed roof. How can i control the direction of the panels? This is really essential in many occasions.
I think I have started understanding it but I actually not very happy with the answer.
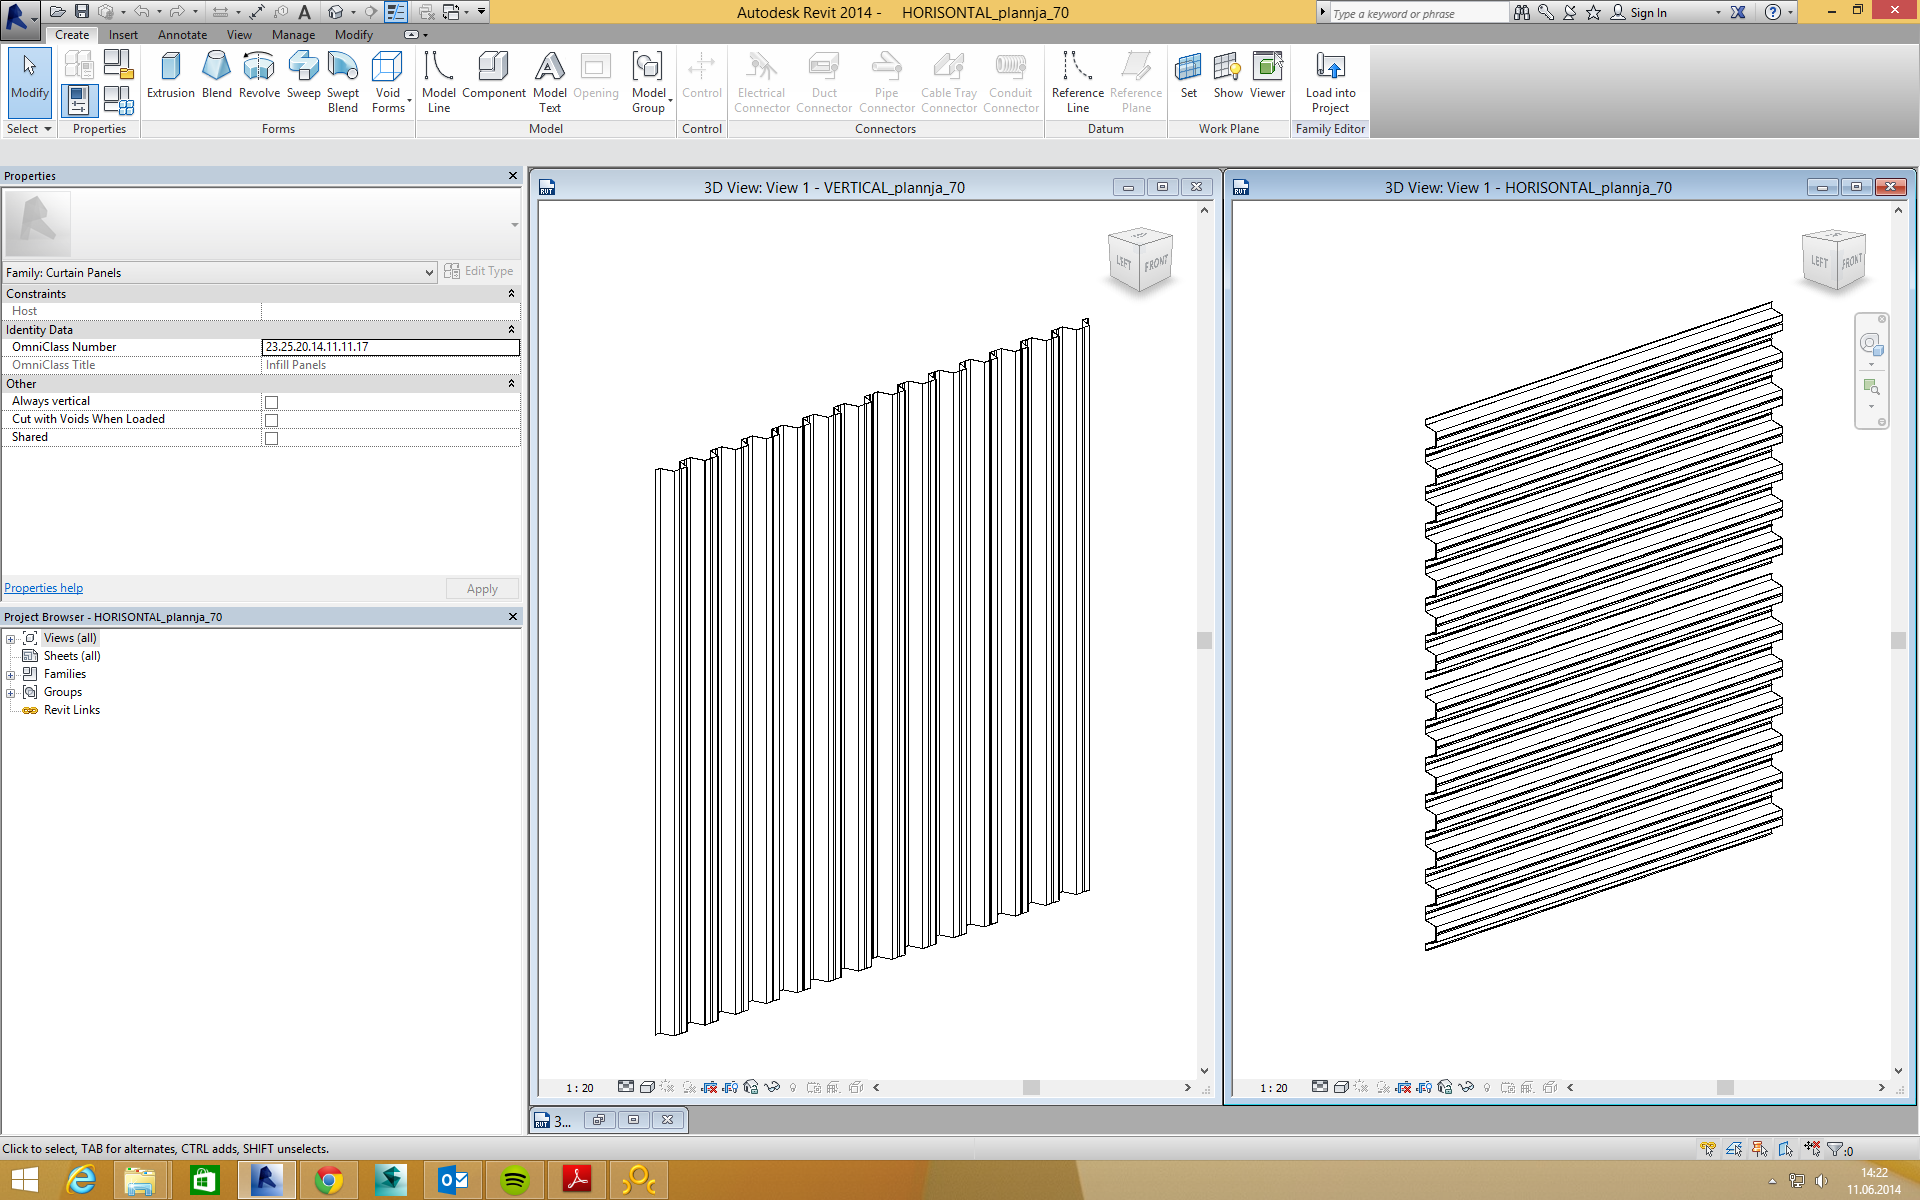
Lets use the CWpanel from the previous panel as an example. I have made two different CWpanel where the only difference is the direction of the profiles («Vertical planja 70″ and Horizontal planja 70»).
I then insert the «Vertical» panels into i Sloped Glazing that is completely flat.
Since it is a flat Glazing there is no up and down, and therefor the direction of the panel is not determined to any elevation. So how can I know how Revit will place the Curtain Panel within the CW?
Well, if you notice the ViewCube you will notice there is an «UP» and as far as I know this will be the «UP» as well for the panel.
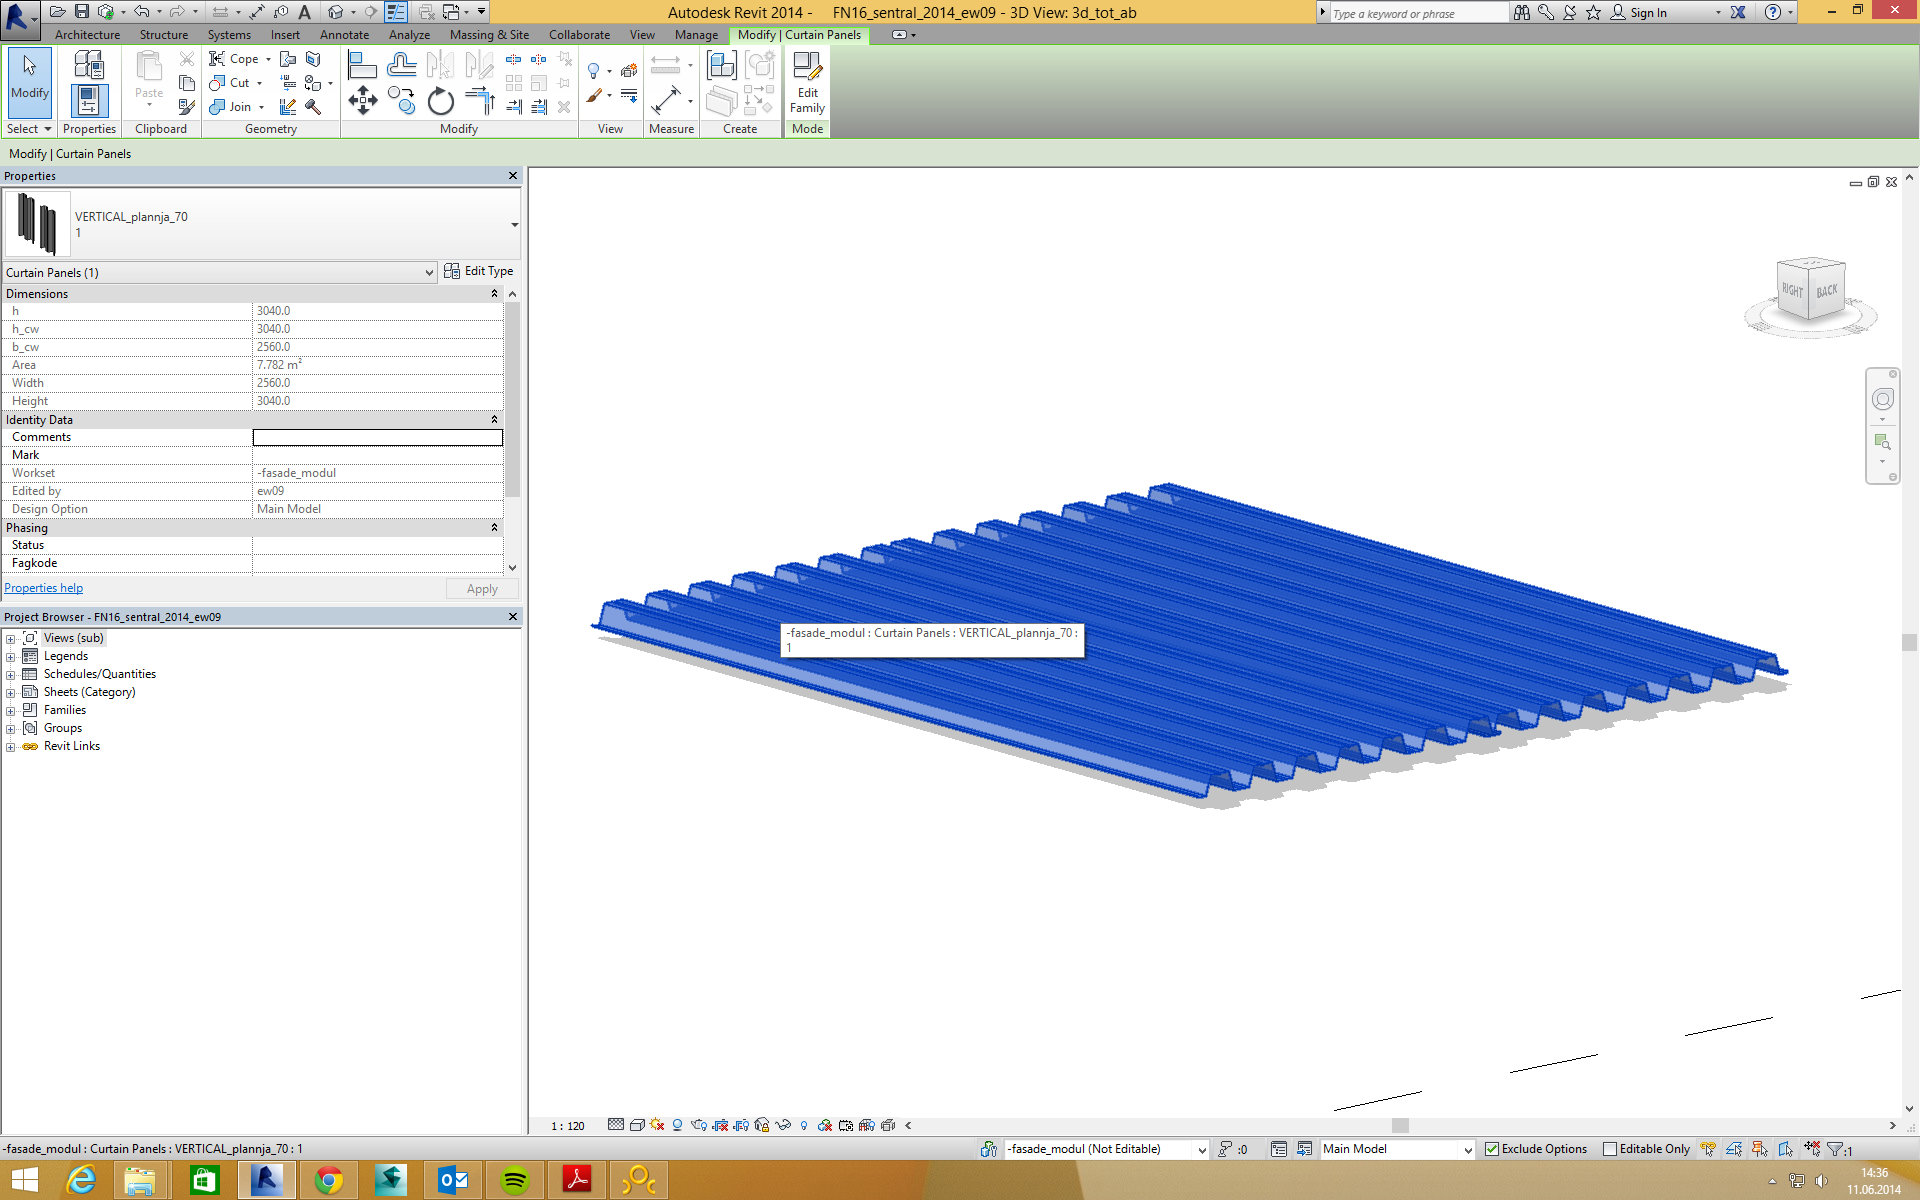
Lets say you want to rotate your panel 90 degrees . The only way you really do that is to replace your vertical panel with the Horisontal panel. If you try to rotate the angle with Grid 2, you will notice that you maximum can rotate the angle by 89 degrees.
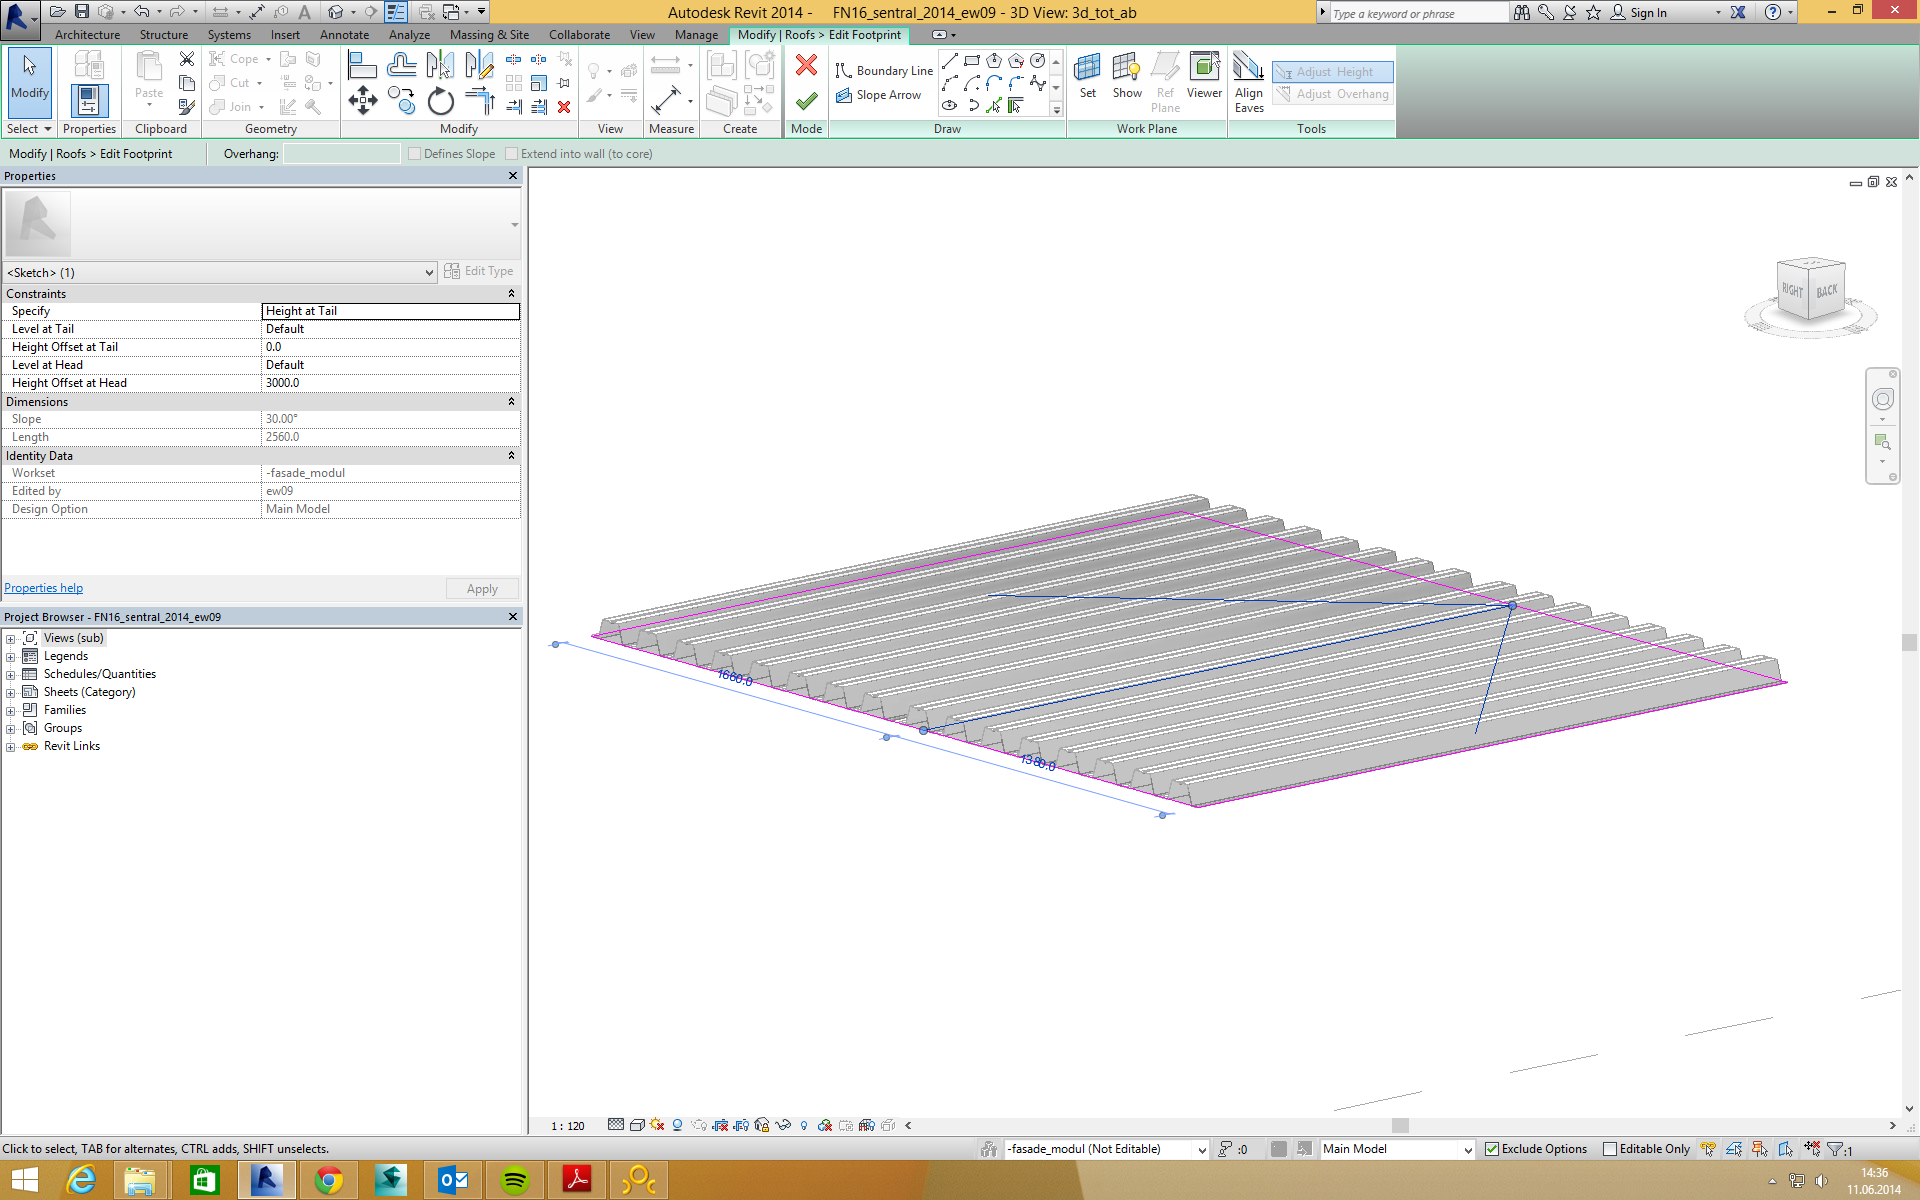
Okay, what happens if I now make a slope on my Sloped Glazed roof? I keep my «Horizontal» panel and add a sloped arrow in sketch mode.
I will then get a error «can’t make type «Horisontal_…», so I have to replace the panel and then replace the Horisontal panel once again. The thing you notice is that the panel now have rotated 90 degrees.
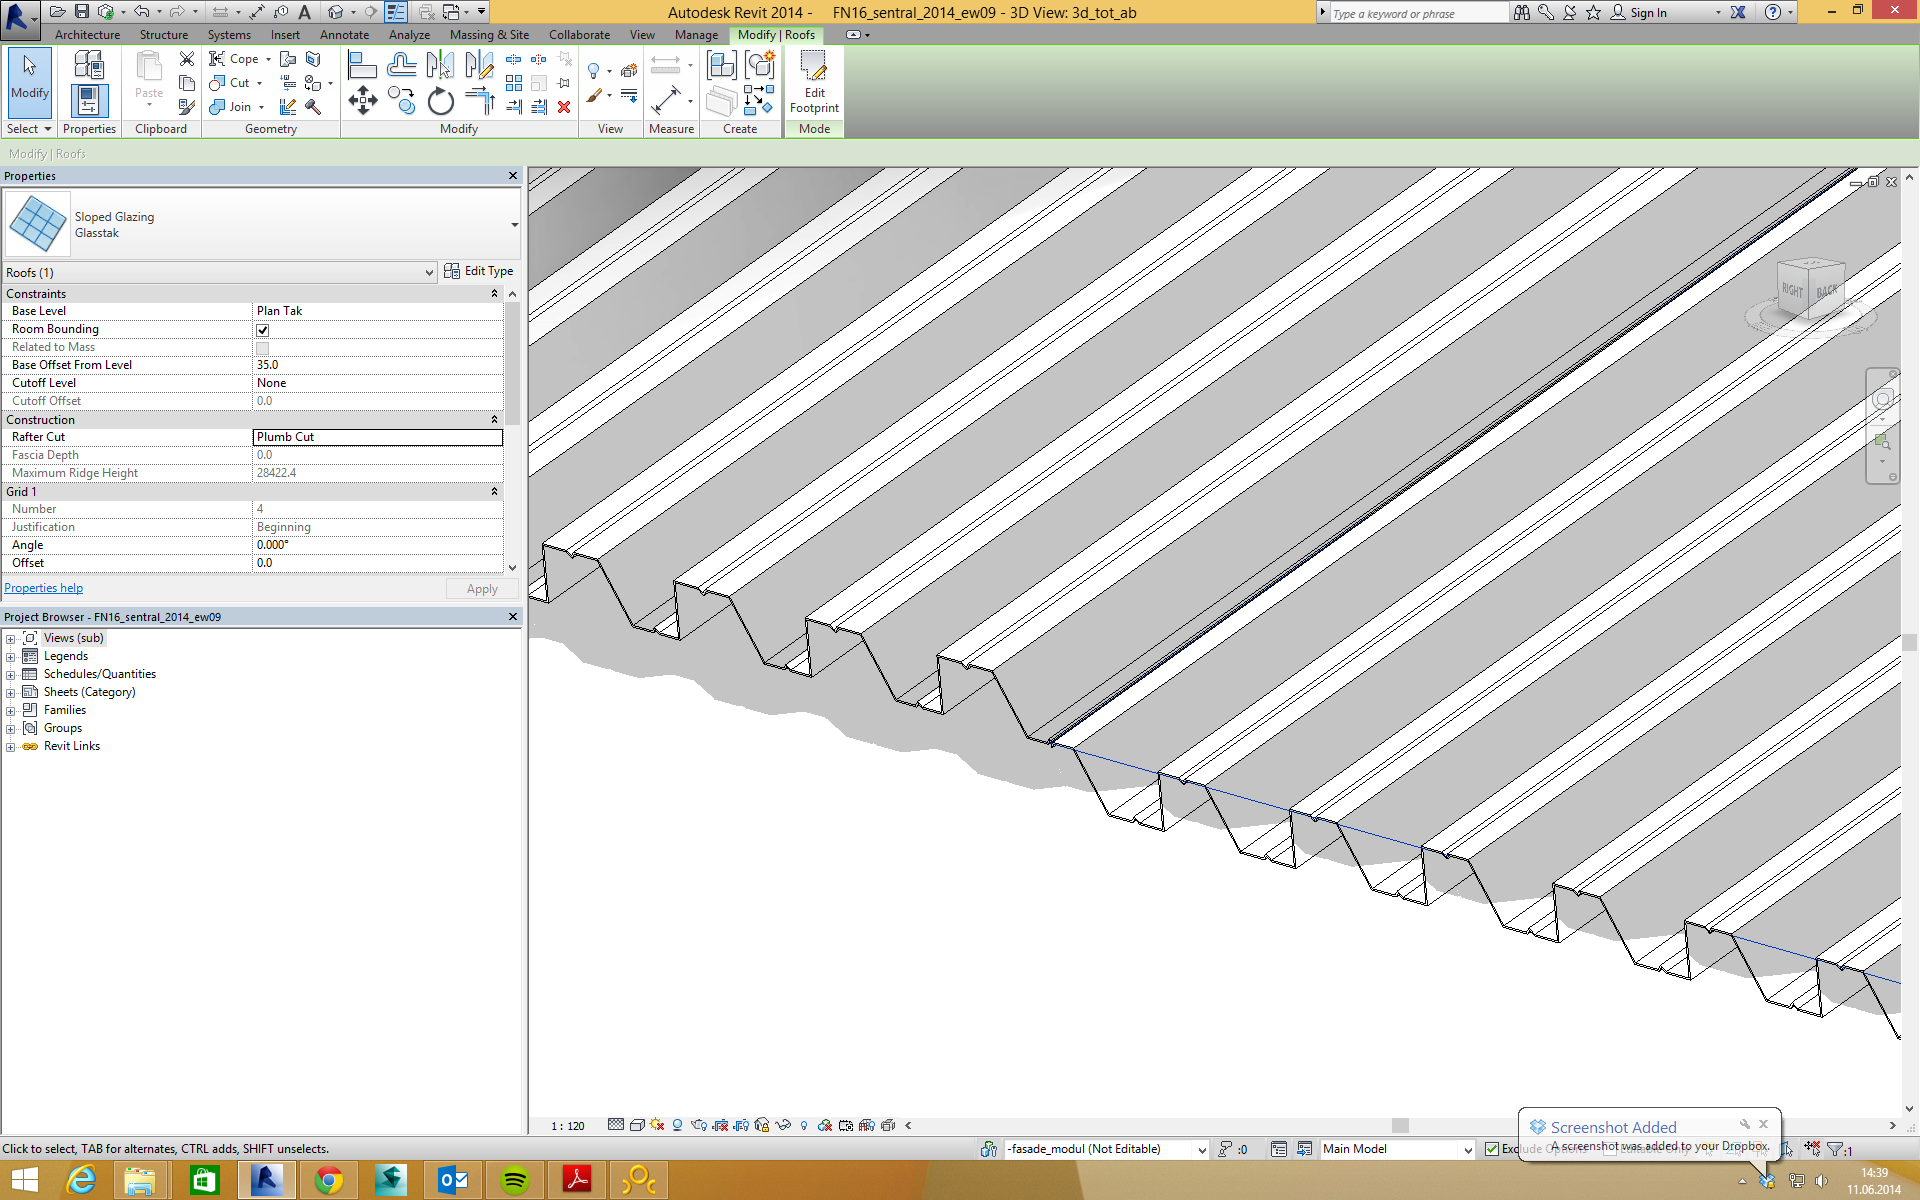
The only way to rotate the panel to the right position now is to replace the Horizontal panel with the Vertical panel.
The conclusion is obvious. When there is no slope, the ViewCube is driving its direction. But when you have a sloped roof, the elevation overriding the ViewCube. This is maybe not a surprise, but it is kind of frustrating when you have to make two different panels, horizontal and vertical, to be able to rotate the panel 90 degrees. It is after all the same type of plate.
In addition, have you ever tried to mirror a Sloped Glazing? Or a Curtain Wall? The inside/outside will be rotated as well…
Sometimes you really want to make something quick (and dirty) but that works for your need. So if you want a roof, a wall or a wall, that don’t have a flat surface, you could use a curtain wall with an adjustable curtain wall panel (CWpanel).
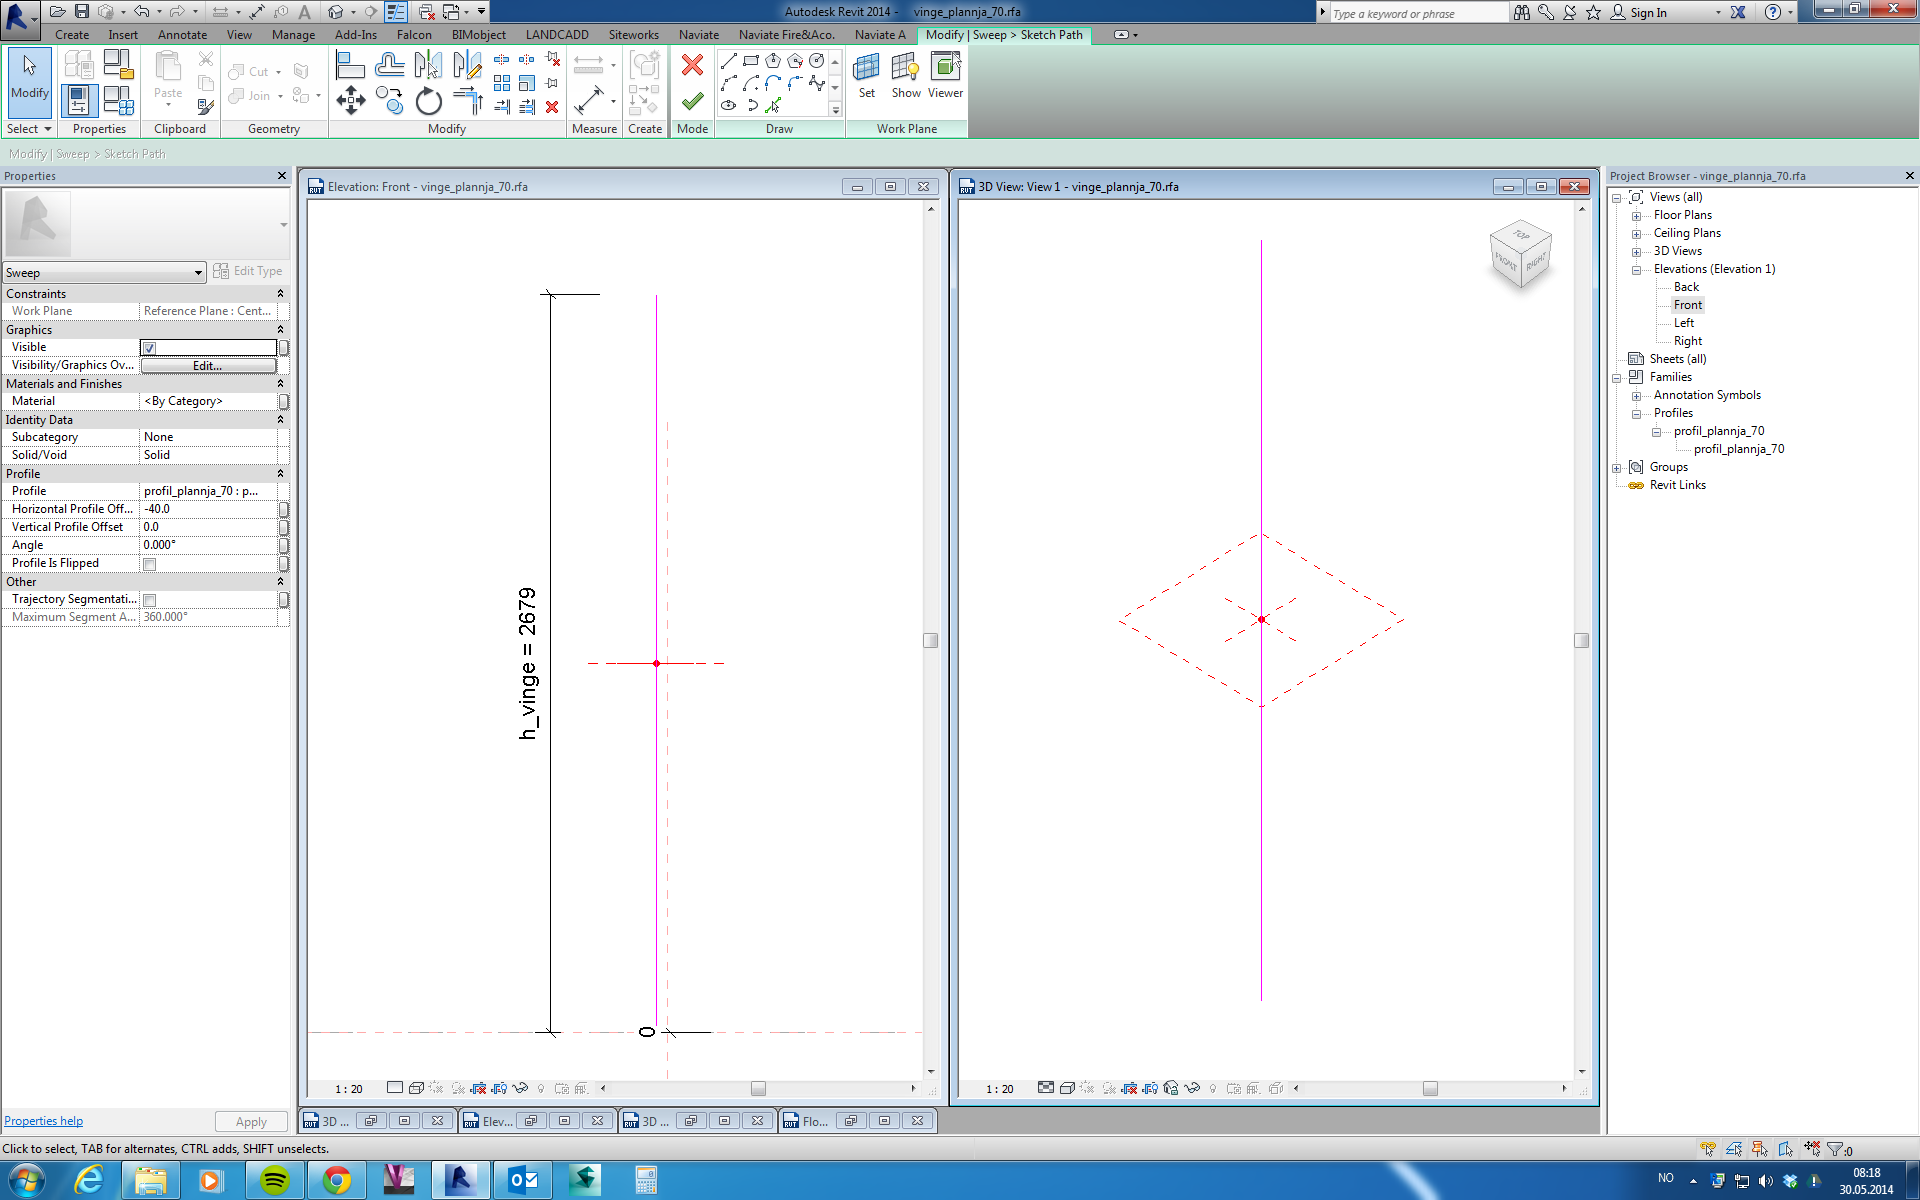
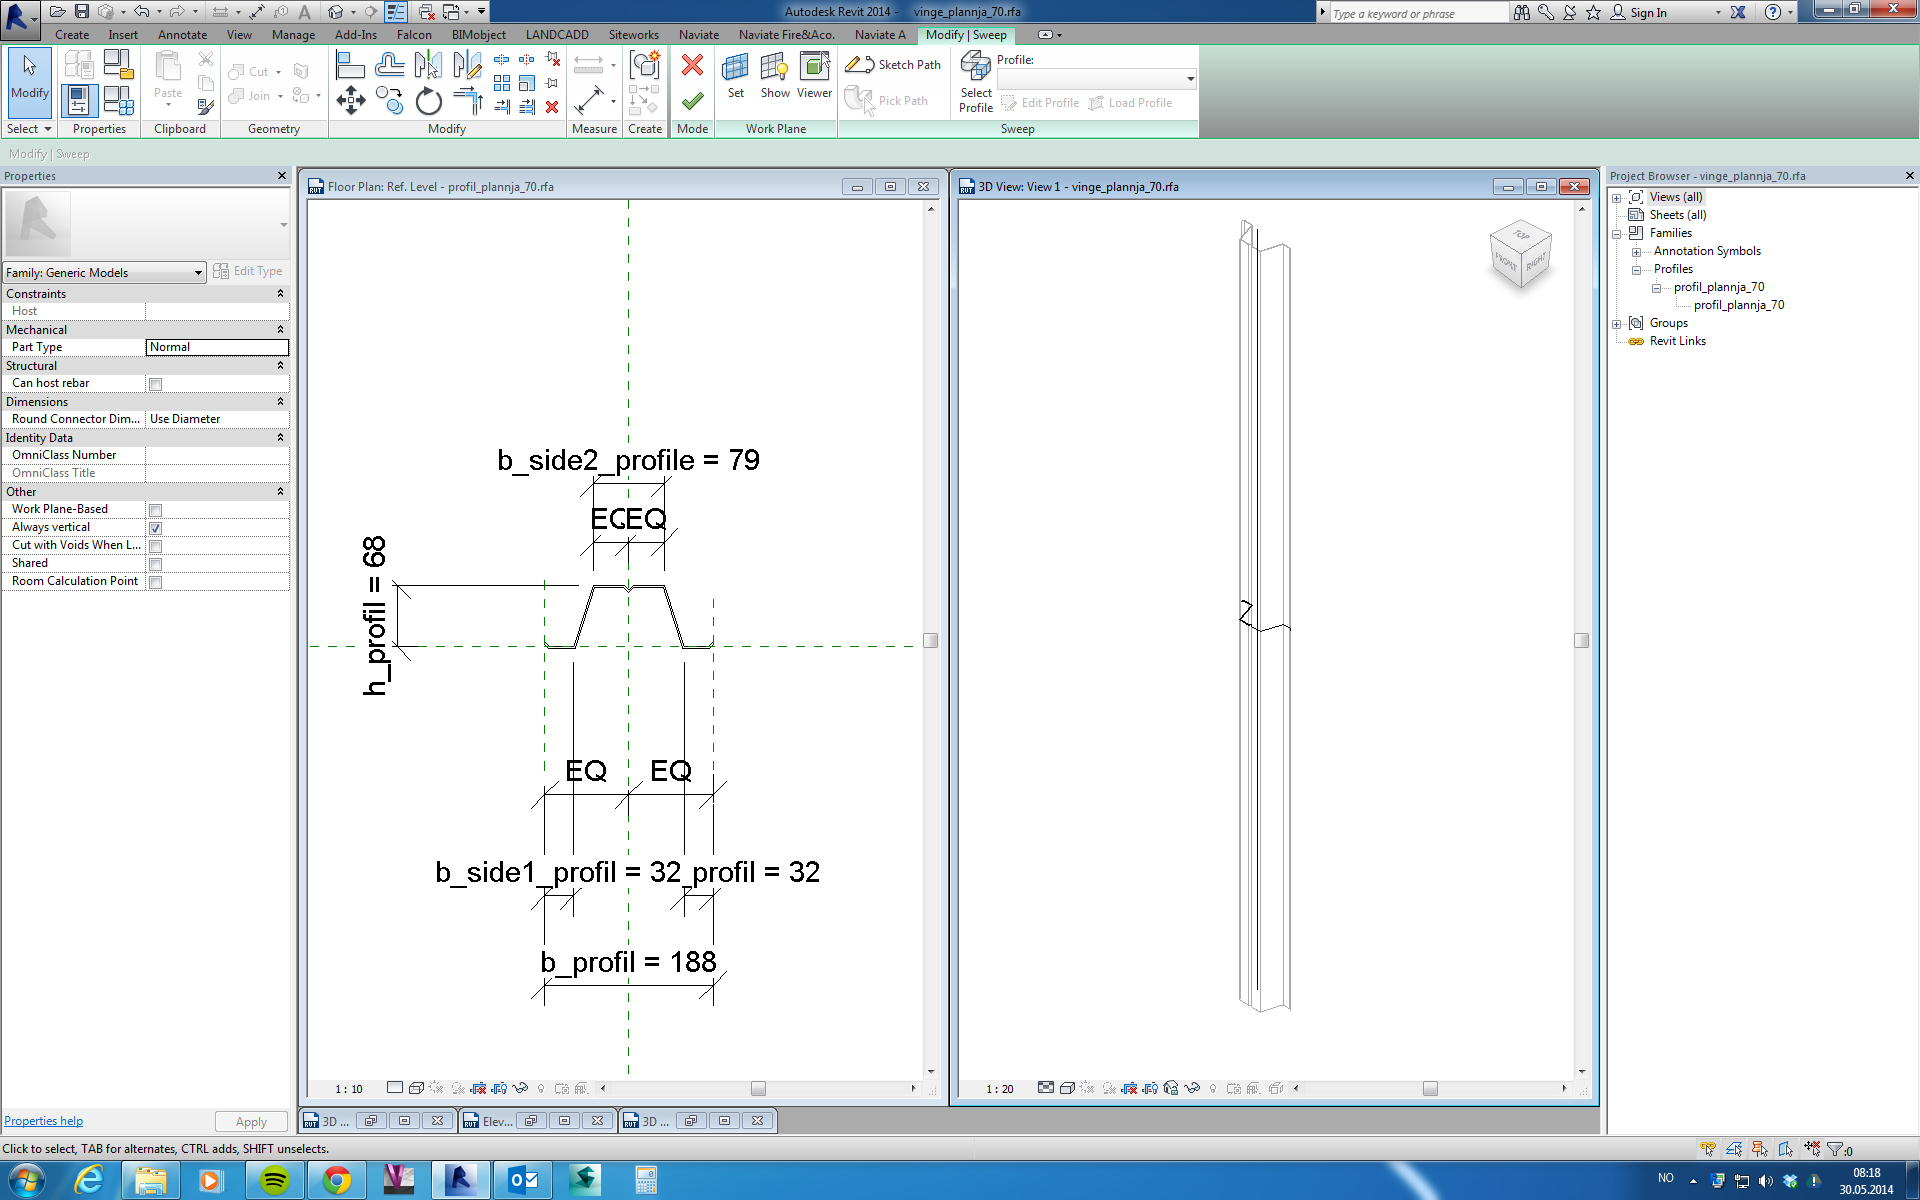
Lets say you are going to make a roof with this profil:
You could start making a profile family with the same measurements as the profile above. Then you sweep this profile in a generic family, with the length of the sweep path as a type parameter:
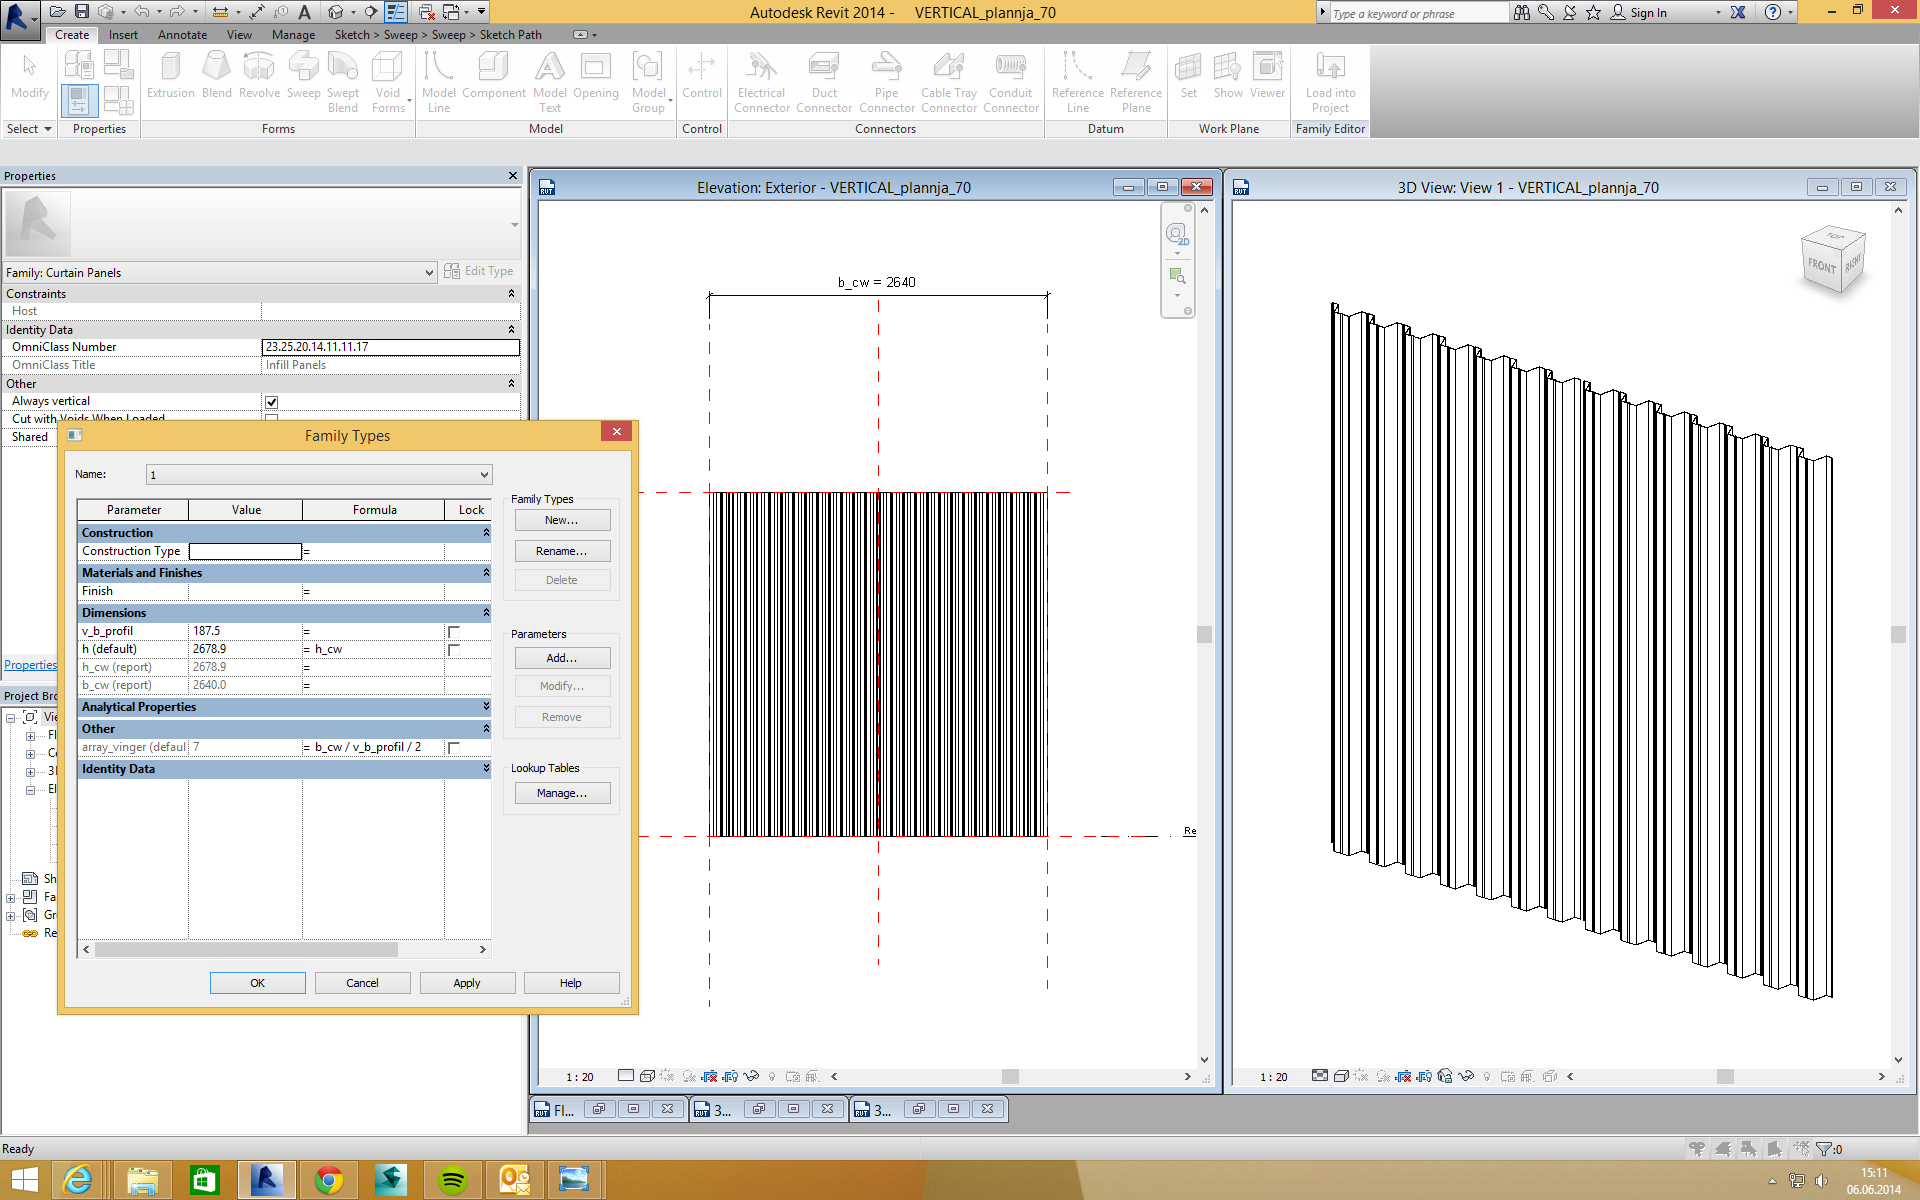
Load this family in the CWpanel and make a array function as shown in the picture below. Use as well the height parameter for the CWpanel as the parameter for height in the sweep.
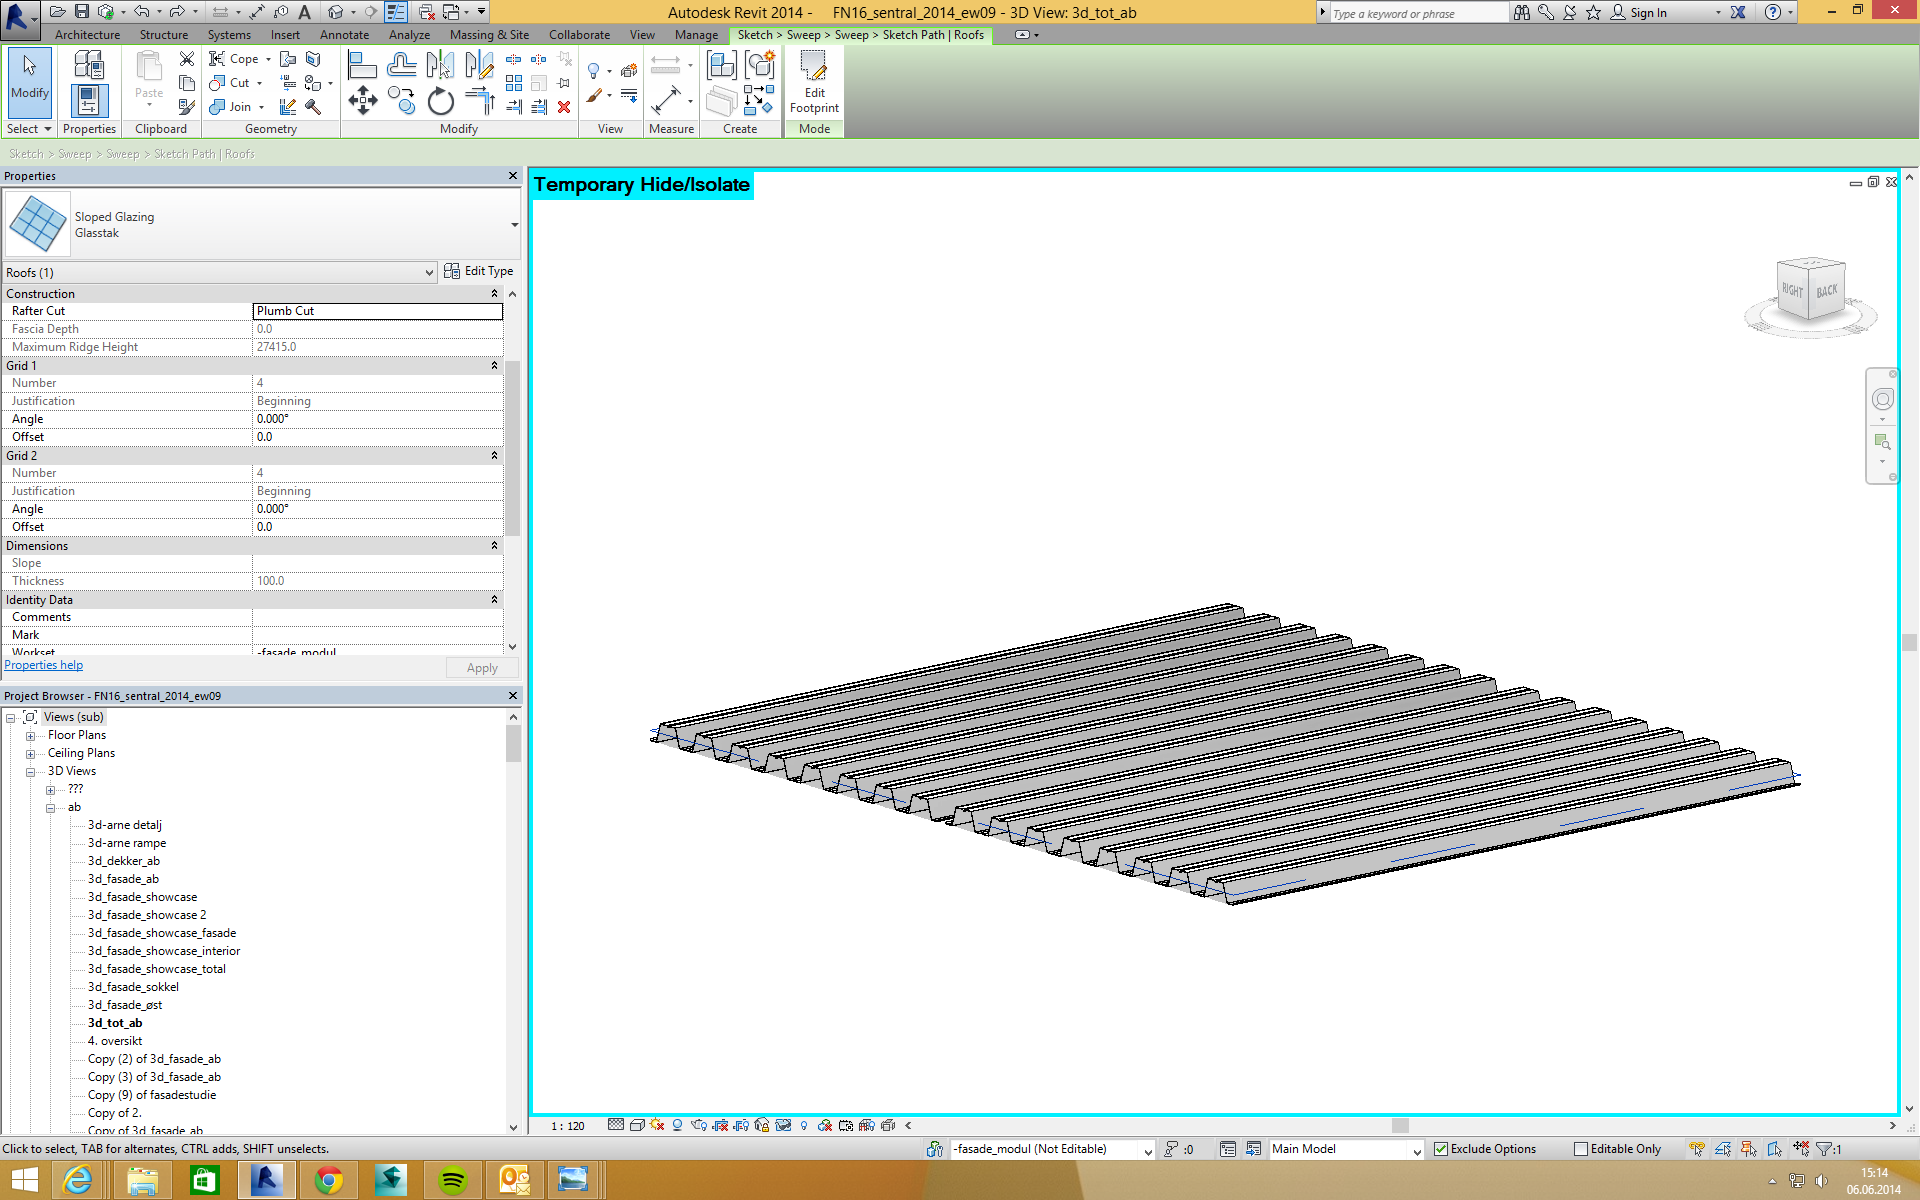
There you go. You have now a roof, a floor, a wall, with you preferred profile.
PS! another way of doing it is to use the profile to make a mullion, and then use this in the CW. Then you make a CWpanel that is empty.


