I guess I have a hang up on photogrammetry lately. But I enjoy the way you can move data quickly in an effortless operation.
Google Maps is getting better and better, and to be honest I am really amazed how you can view an entire city in great detail. We use Google Maps in our office to investigate exciting sites and surroundings, and I have thought that it would have been valuable to import this information into Revit.
And guess what, by using photogrammetry I made it happen:)
In short:
open google maps in full screen and find your building site
rotate the view around your site meanwhile you press «print screen» as often as you wish
with dropbox installed, the «print screens» should be perfectly downloaded automatically
you should crop your photos to get rid of unwanted text/labels. You can do this by making an «action» in Photoshop and then choose «File» – «Scripts» – «Image Processor» to crop every photos in a folder
then you make a mesh in Memento with your cropped photos and export it in RCP
import it into Revit and enjoy
PS! For fun, I also tried to do photogrammetry with Google Streetview. It was not successful but I will try again later. I do have some ideas:)
The last five years, my family have been visiting «Kristiansand Zoo and Amusement Park» in the summer holiday. It is a great park that has a lot to offer to children in different ages, and we usually stay there for two full days.
Even I get the great feeling of being young again. I relive my own experience when I visited the park as a kid, and it is great to be childish together with my son on a pirate ship and shout «yo ho».
There is of course a stress factor involved. You have two children to look after, ice cream in one hand, camera in the other, a lot of people running and walking, and you are trying to meet the expectation of the children.
But even then, you want to capture this moment, the feeling of joy and anticipation. And for decades we have captured this moment with photos and videos, and we post it on different social mediums. And before this existed, we placed the photos in a family album. But what if we could push it to a new level. Could I manage to tell a story of my experience in a different way?
Well, the result was somewhat successful regarding the time and limitation I had taking the photos. No, I did not bring a drone to capture photos from the skies:) Nor did I have the privilege to stroll around in my desired speed. But hey! I got some decent results from some of the places we visit during our stay in the park. I only wished I could have captured my great kids as well but have you ever tried to ask your kids to stand still in five minutes in a amusement park… 🙂
I have been using Windows 10 for four months now. I have installed it on my five year old Macbook Pro and I must say it is working superbly. There has been some minor bugs, but that has not been related to Revit 2016. Memento has been a little unstable, but since the program is in beta mode I am not sure I should blame the operating system.
Remember that this is written by an architect. An architect that is not interested in reading technical manuals, or do to many preparations. So this is not a review. It is more a list of thoughts:)
Trimble DPI-8
I have tested the Trimble DPI-8 scanner for 24 hours now, and it is time to make a summary of my experience. But first of all, what kind of scanner is the DPI-8? The scanner is an handheld scanner that weight about a kilo so it is just light enough to be held with one hand. The other hand can easily operate the touchscreen when you are configuring the scan. The touchscreen is in fact a pad that runs on Android, and on the back of the pad there is attached to a scanner and a camera. They are connected to the pad with an micro USB cable. It seems fairly well built, but at the same time it is just basic components that is connected together. Why not? And why should you be interested in this scanner?
As an architect, I sometimes get comments from the entrepreneurs that I should be more on the construction site to see how it is actually being built. And there is nothing more I want to do, but the construction time is so cramped and I have to prioritize my time very carefully. In addition when I ask for surveys for my detaildrawings, they do not manage to survey them in time before my deadline. Yes we are talking about the importance of collaborating together in a multidisciplinary BIM model, with the benefits of clash detection etc. But there is little talk about how to gather information during construction time.
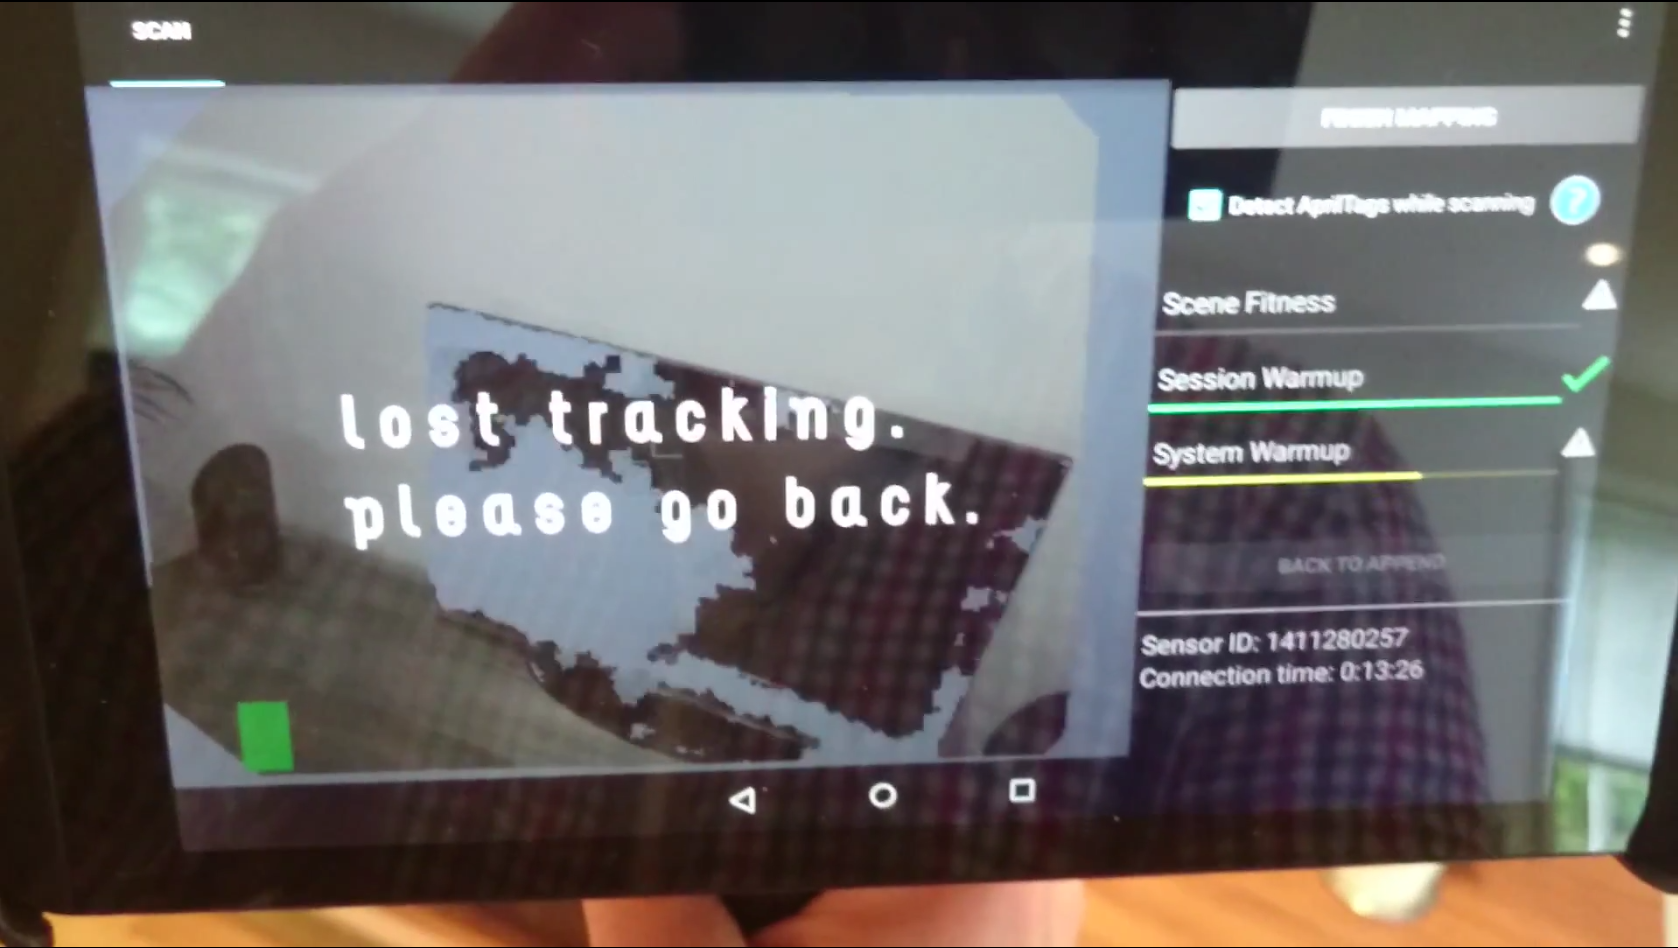
Sometimes you are a bit lost…
Here is where we can improve by using new techniques of building data capture, with more efficient collaboration processes. That is why I see a lot of potential in the DPI-8. It is not perfect, and in many ways it feels like the first generation of this type of scanner, but it gives an great insight in how the future of handheld/robot scanning should be. And I am looking forward seeing all the technology that is pushing in this direction, with Google tango and Intel pushing each other.
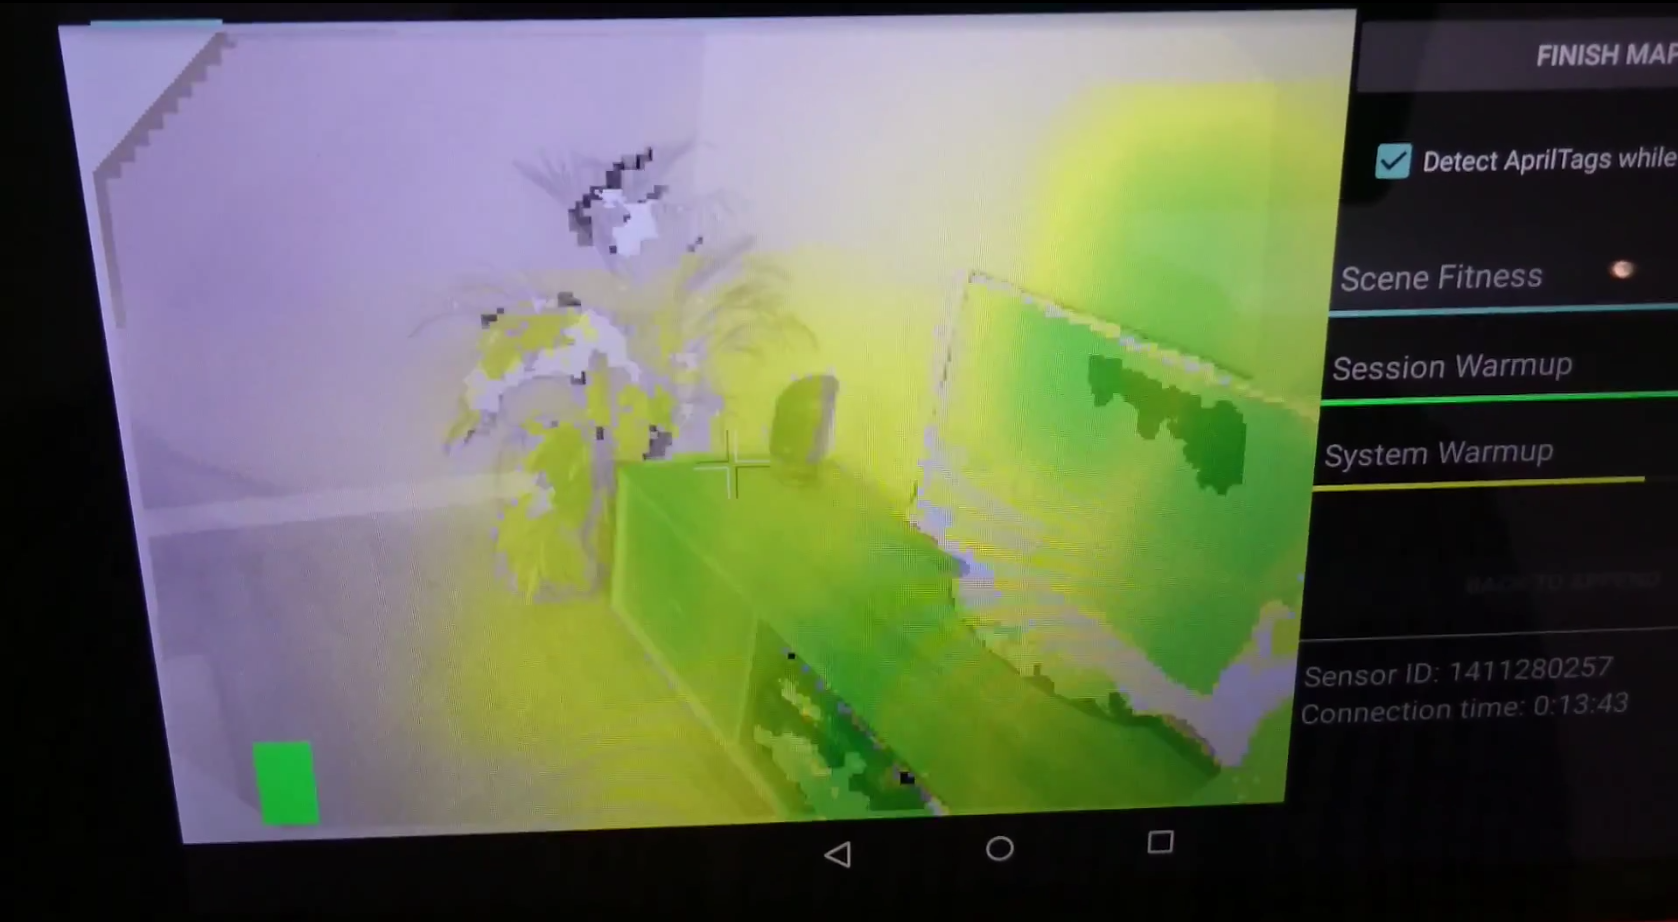
…but usually you are on track
Okay. The DPI-8 is intuitive. The software is an app and it is pretty straight forward. I did not miss any functionality during my limited test period and the software seemed rather stable. Regarding the scanning, there was a steep learning curve but not in a frustrating way. The information that is displayed on the screen during the scan is constantly giving you feedback how you should proceed scanning, and what area you have scanned so far. If it is displays as green you have a good scan of that area, and if it is yellow you have a medium good scan. And the best part is actually that you can study your scan immediately after the scan is done on the pad. This way, you can see if you have a successful scan before you leave the construction site.
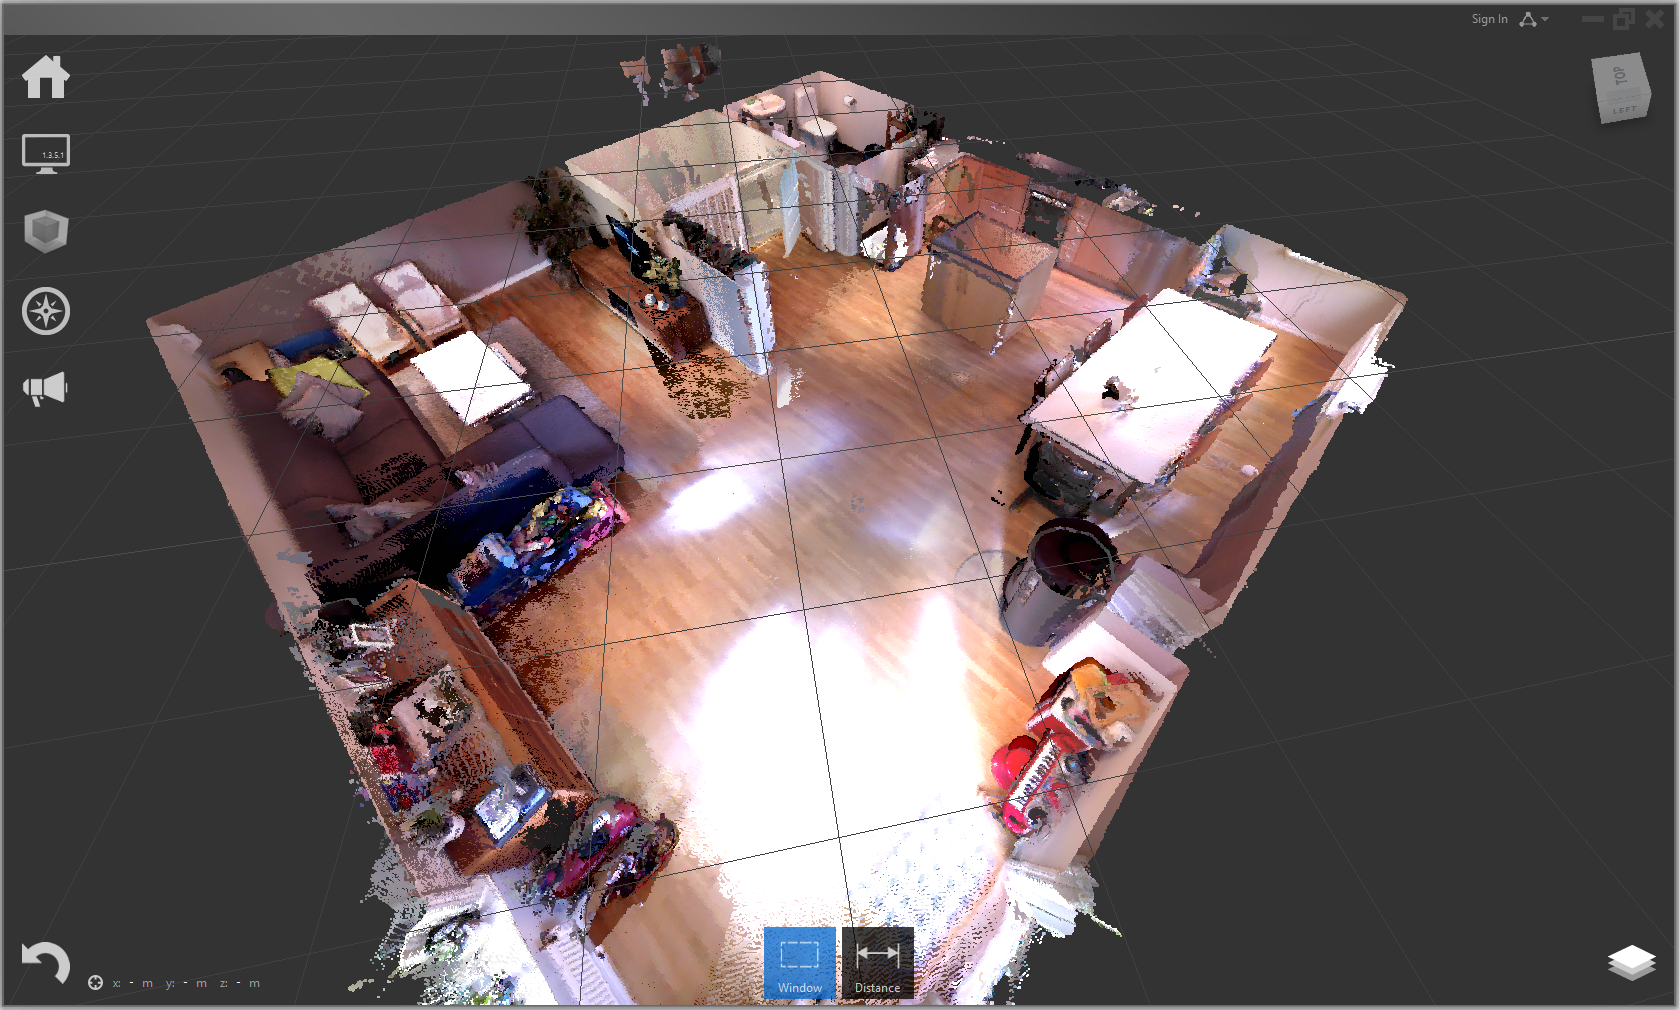
Point cloud in Recap based on four DPI-8 scans
The software offers different export formats and during my test period, I ended up exporting to PTS and imported this to Recap. I tried to import it directly to Revit, but while indexing the point cloud, it failed halfway. Other remarks in a randomly order:
scanning and exporting drains the battery. Make sure it is fully charged
since the memory is (too) small during scanning, you have to «divide» your scans. The is an option called «append» that let you use the same origo as the previous scan. It works surprisingly well.
It is a little bit confusing the difference between «scene», «session» and «export»
this scanner do not work in strong daylight
go slooowly. Or else you will «loose track»
when transferring files from the pad, to the PC be careful! I experienced multiple severe windows crashes
when scanning mirrors, you can get some funny results
read more about the accuracy of the scanner on Trimble webpage. I have not compared it to my results yet.
Yes I have used the scanner only one long day and night… But finally I could play with a gadget that actually made sense. I had great fun testing the scanners limits and I am wondering if this scanner should be a standard equipment for an architect firm? Maybe for architect firms that do a lot of refurbishment? The future is exciting and I am looking forward seeing the construction site being scanned live and continuously with robots or fixed scanners in every room.
They are becoming cheap and I want one!
PS! Special thanks to Geomatikk Survey who let me test the DPI-8, and to Margarida Jerónimo Barbosa who gave me valuable feedback on my post
Update 05.07.2015: The scanner is owned by the Norwegian University of Life Sciences for research purpose but have been sponsored by Geomatikk Survey
I have been taking a lot of photos lately to test different photogrammetry software, and sometimes I feel that the results is better than it should have been since I usually shoot from my hip.
One of my favorite programs is Memento from Autodesk that is a really great software. Memento is in Beta mode but has the tools you need to generate a mesh/pointcloud from your pictures. The interface is really great and it is easy to use.
It has some issues with Z-direction and scaling when you export it, but hopefully they will fix this bug shortly. It is also frustrating that it is not possible to import the mesh into Revit. Therefor you need to export the model as a pointcloud to import it to Revit, and that is a pity. It would have been great to use the mesh to create sun study for instance, or to create the surroundings to your project. This is not a Memento problem. It is a Revit problem.
Remember to import your cool models into Sketchfab so you can show them to your colleges or embed them into your homepage (if they support it…) 🙂
Sometimes new technology needs to mature before it is efficient or useful to use in the daily work. And as an architect, I always need to balance the time and effort to play with new tools that may be useful in the future.
Photogrammetry on the other hand is not a new technology anymore. But since new software makes the process much smoother, and the prices for drones has been dropping, there is a lot of new potential with this technology.
That is why I have made a couple of case studies lately, to understand the limitation and possibilities for a real life project. My first experiment is with the DJI Phantom 2 drone, and I wanted to see what kind of accuracy I got from the mesh and the pointcloud from the photogrammetry.
I was rather impressed to see the results if you take in consideration that the drone only took 31 photos, but maybe it is not accurate enough to use it in the design phase. But then again, how accurate do you actually need the surroundings to be? When you import it to Revit, the pointcloud may give value as an reference.
Special thanks to Geomatikk Survey for the excellent drone service.
I am going to work on a project together with an architect that is located far away from where I am located, so I have been trying to find a good solution how to work together on the same Revit model without too much hassel.
I hoped that I could avoid setting up a server, and wanted therefor to try use the A360 service. I soon understood that I needed the Autodesk A360 Collaboration for Revit subscription, but when I tried to buy it I was forwarded to the European Autodesk site. Here I did not have an option for subscribing this service.
I talked to the Autodesk staff and understood that it was only available in North America and he did not know when it was going to be released outside North America.
I have been working at Dark Architects since 2006, but I felt it now was time to experience other types of projects and opportunities. I therefore decided to start my own office called Hel Ved Arkitektur AS.
«Hel Ved» litterally means solid wood, but it is also an expression that has a deeper understanding. In Norway we use the expression for describing something, or someone, that is «rock solid» and «genuine».
These values are values I wish my company will be associated with, both regarding architecture and management.
I notice that I encounters different challenges now that I am a small company regarding technology and digital design compared to my previous workplace. I am looking forward to post these experience on this blog.
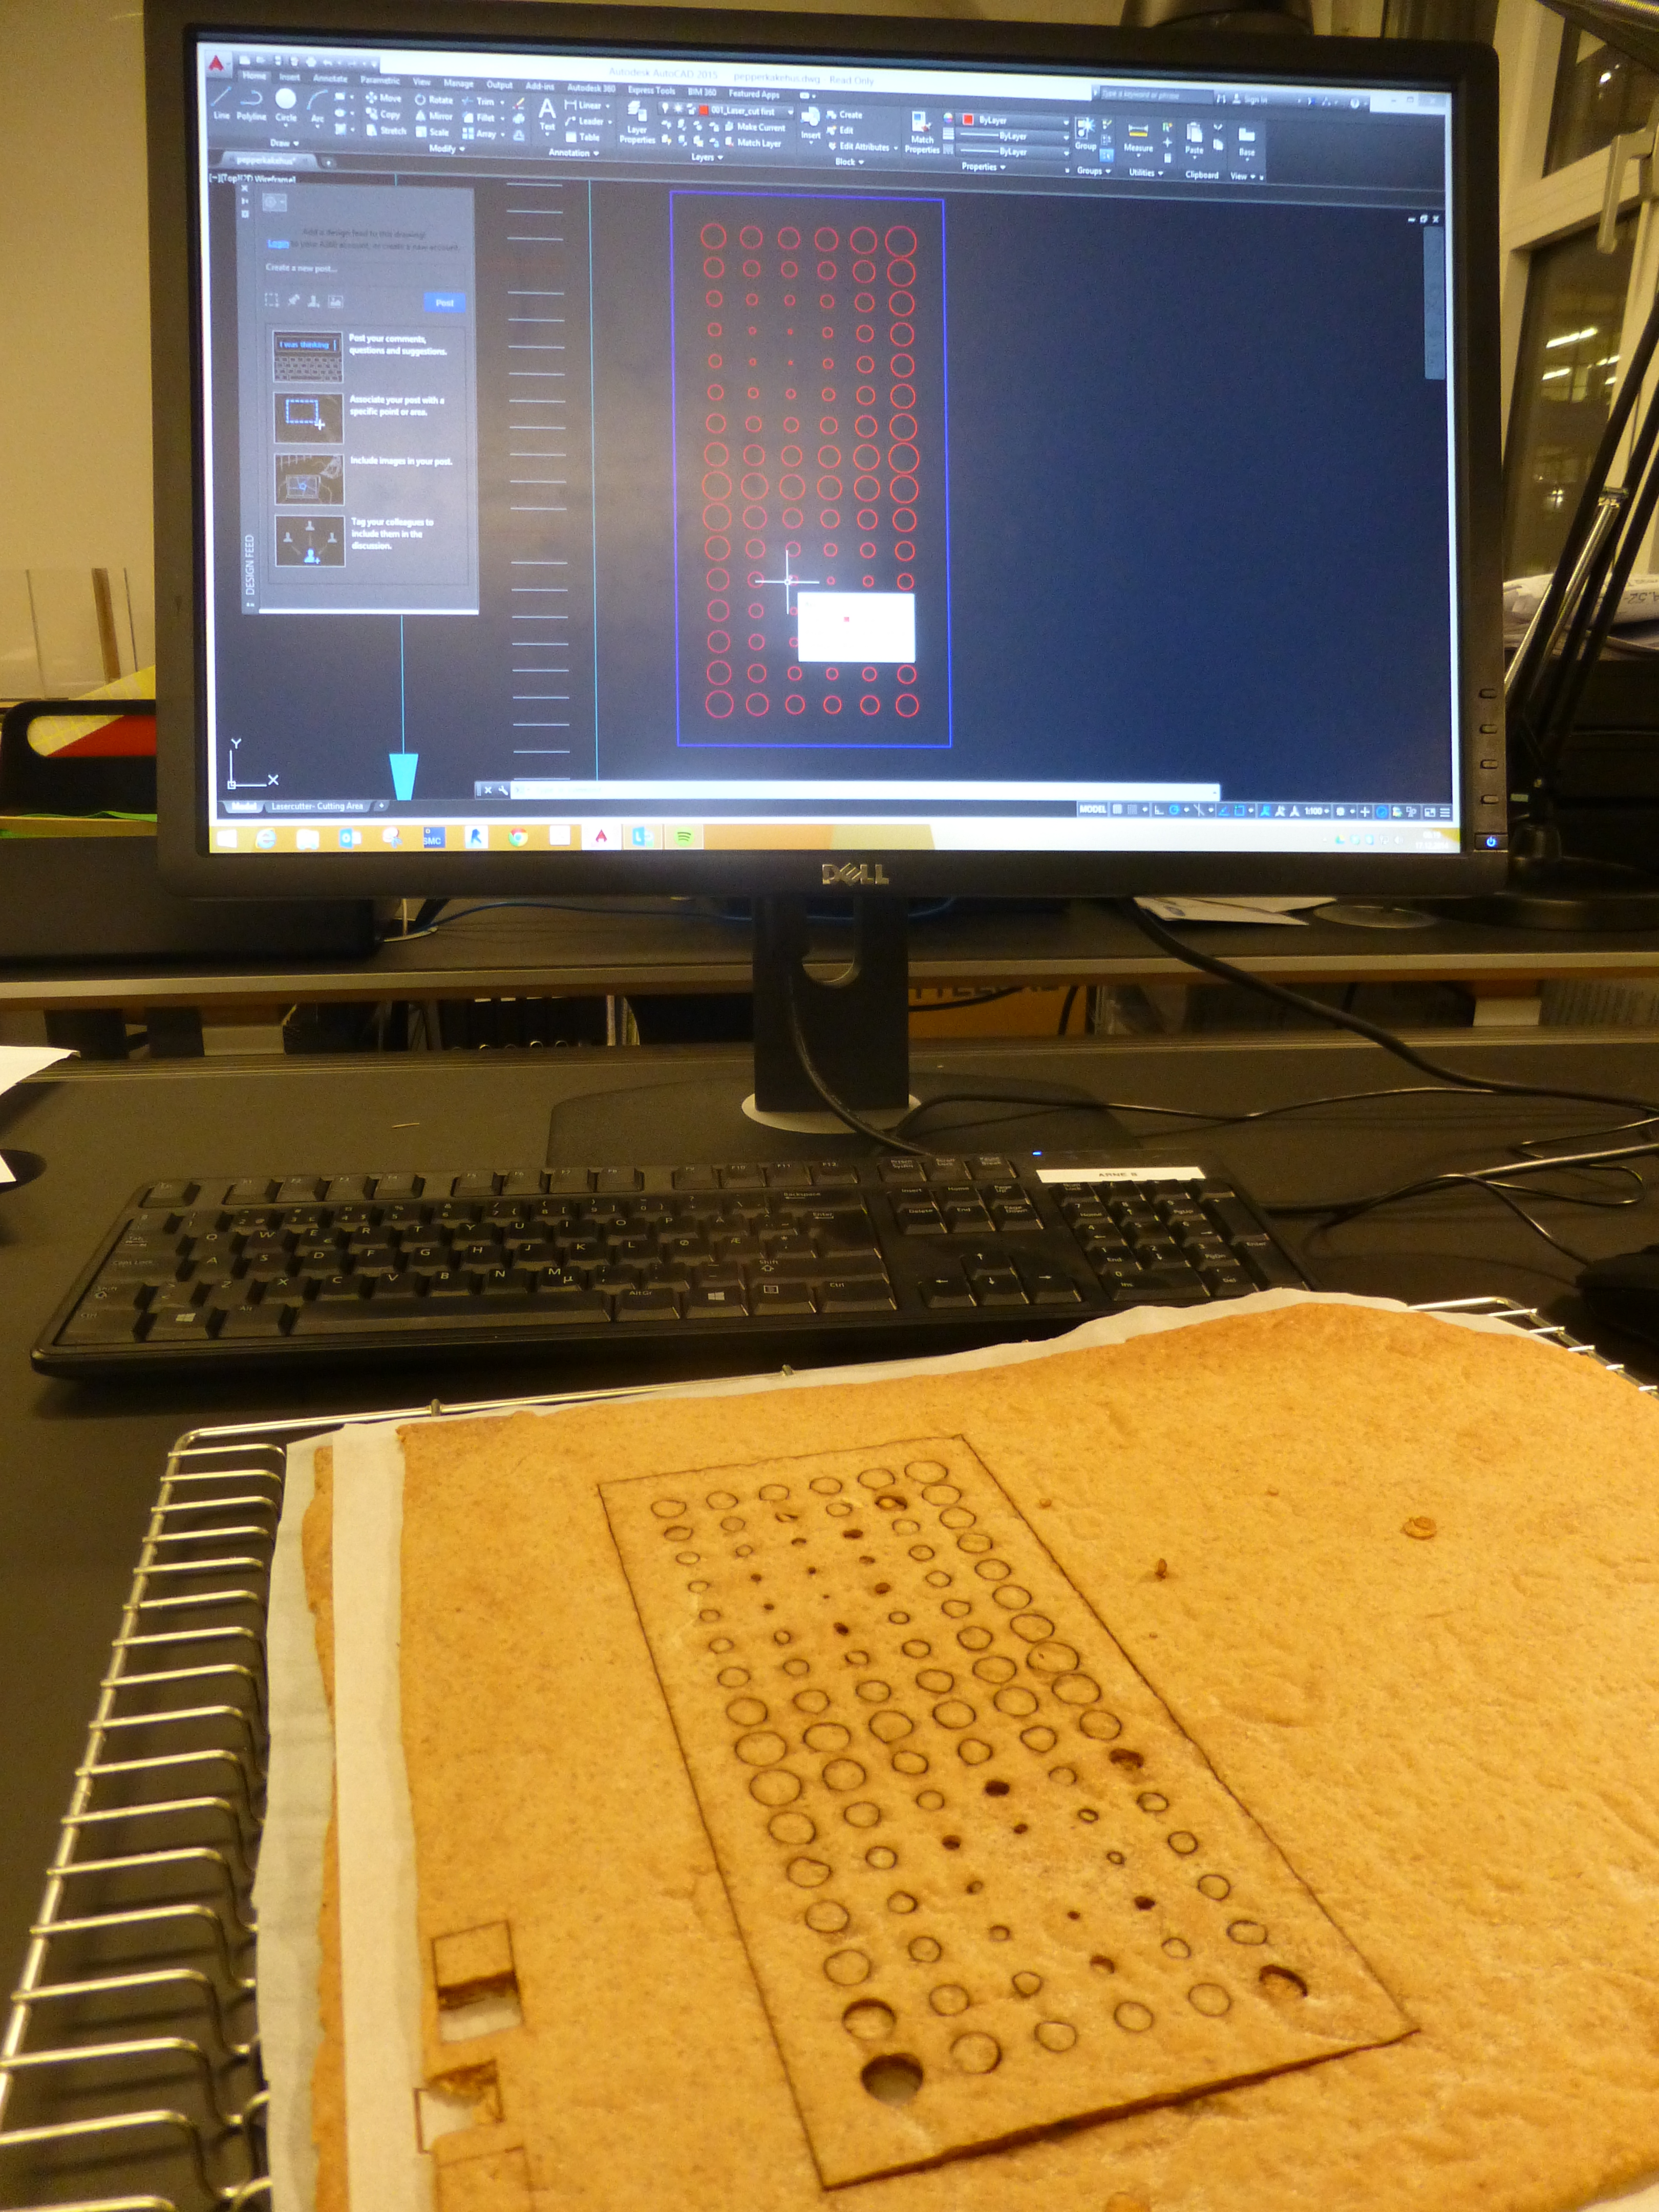
Just imagine the power of combining a lasercutter and gingerbread. I have talked about it many times, and it was time to «walk the talk».
Step 1: Roll’it out
Step 2: Lazzzer it up
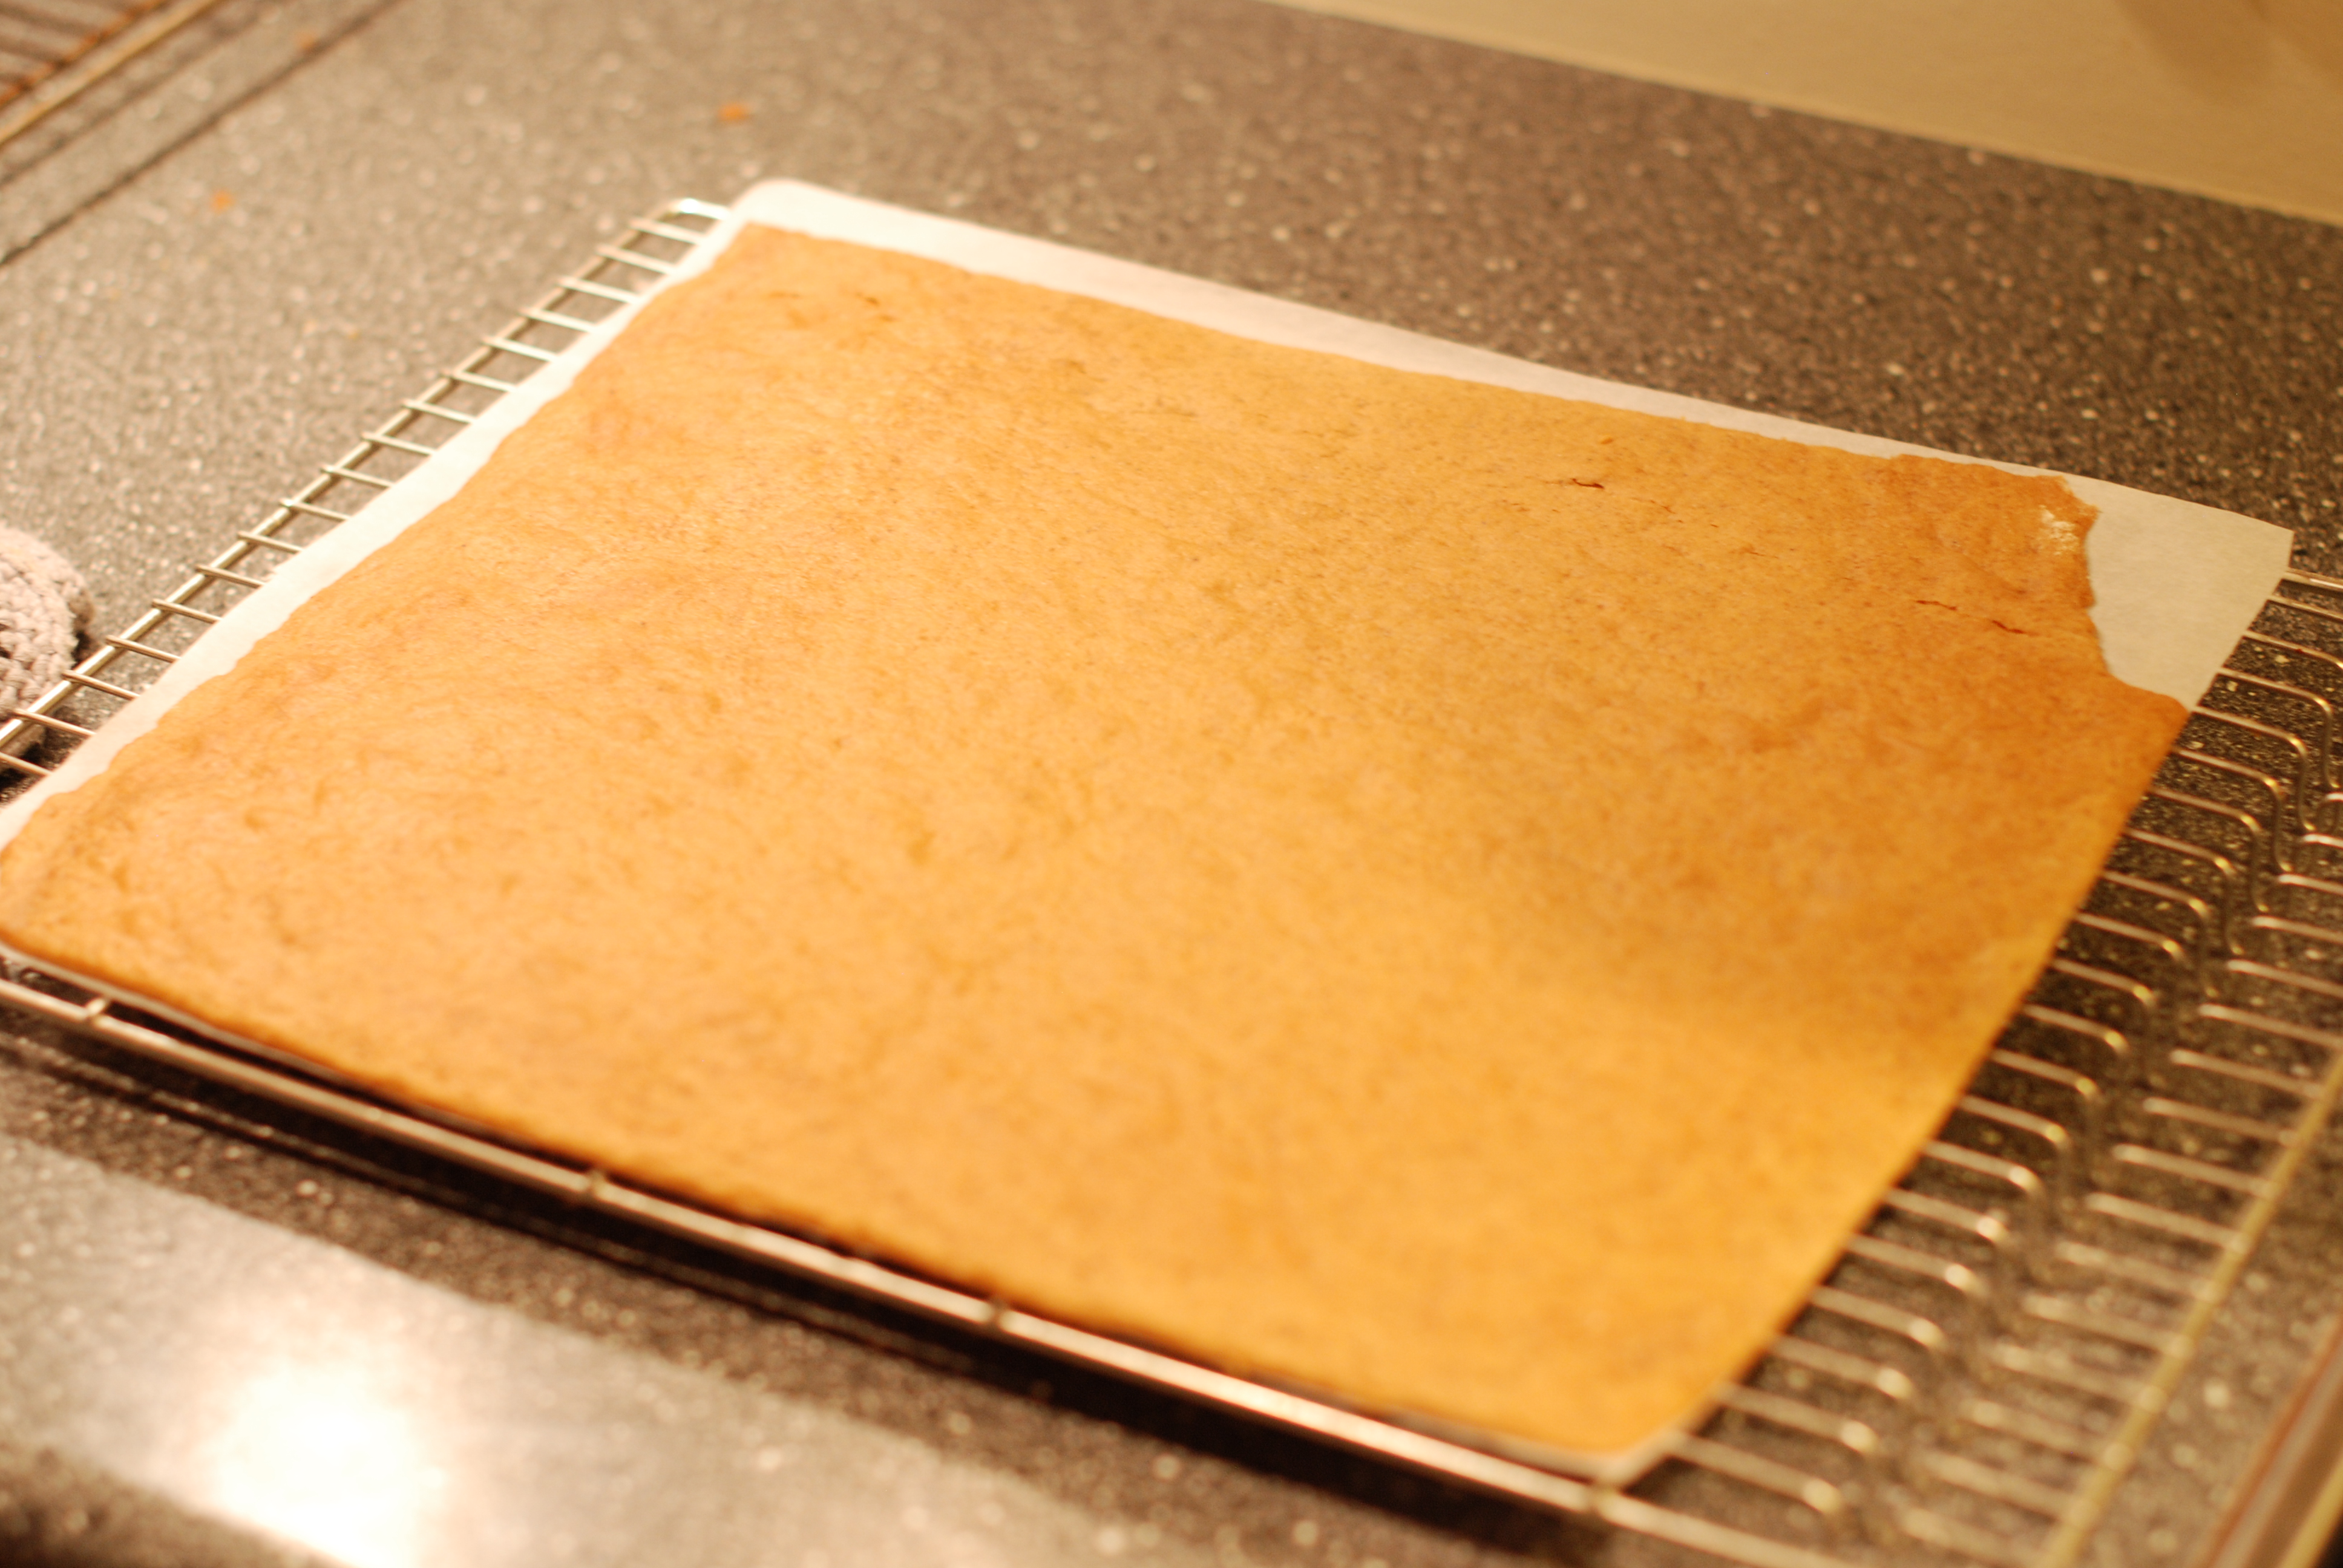
Step 3: Reviewing the results
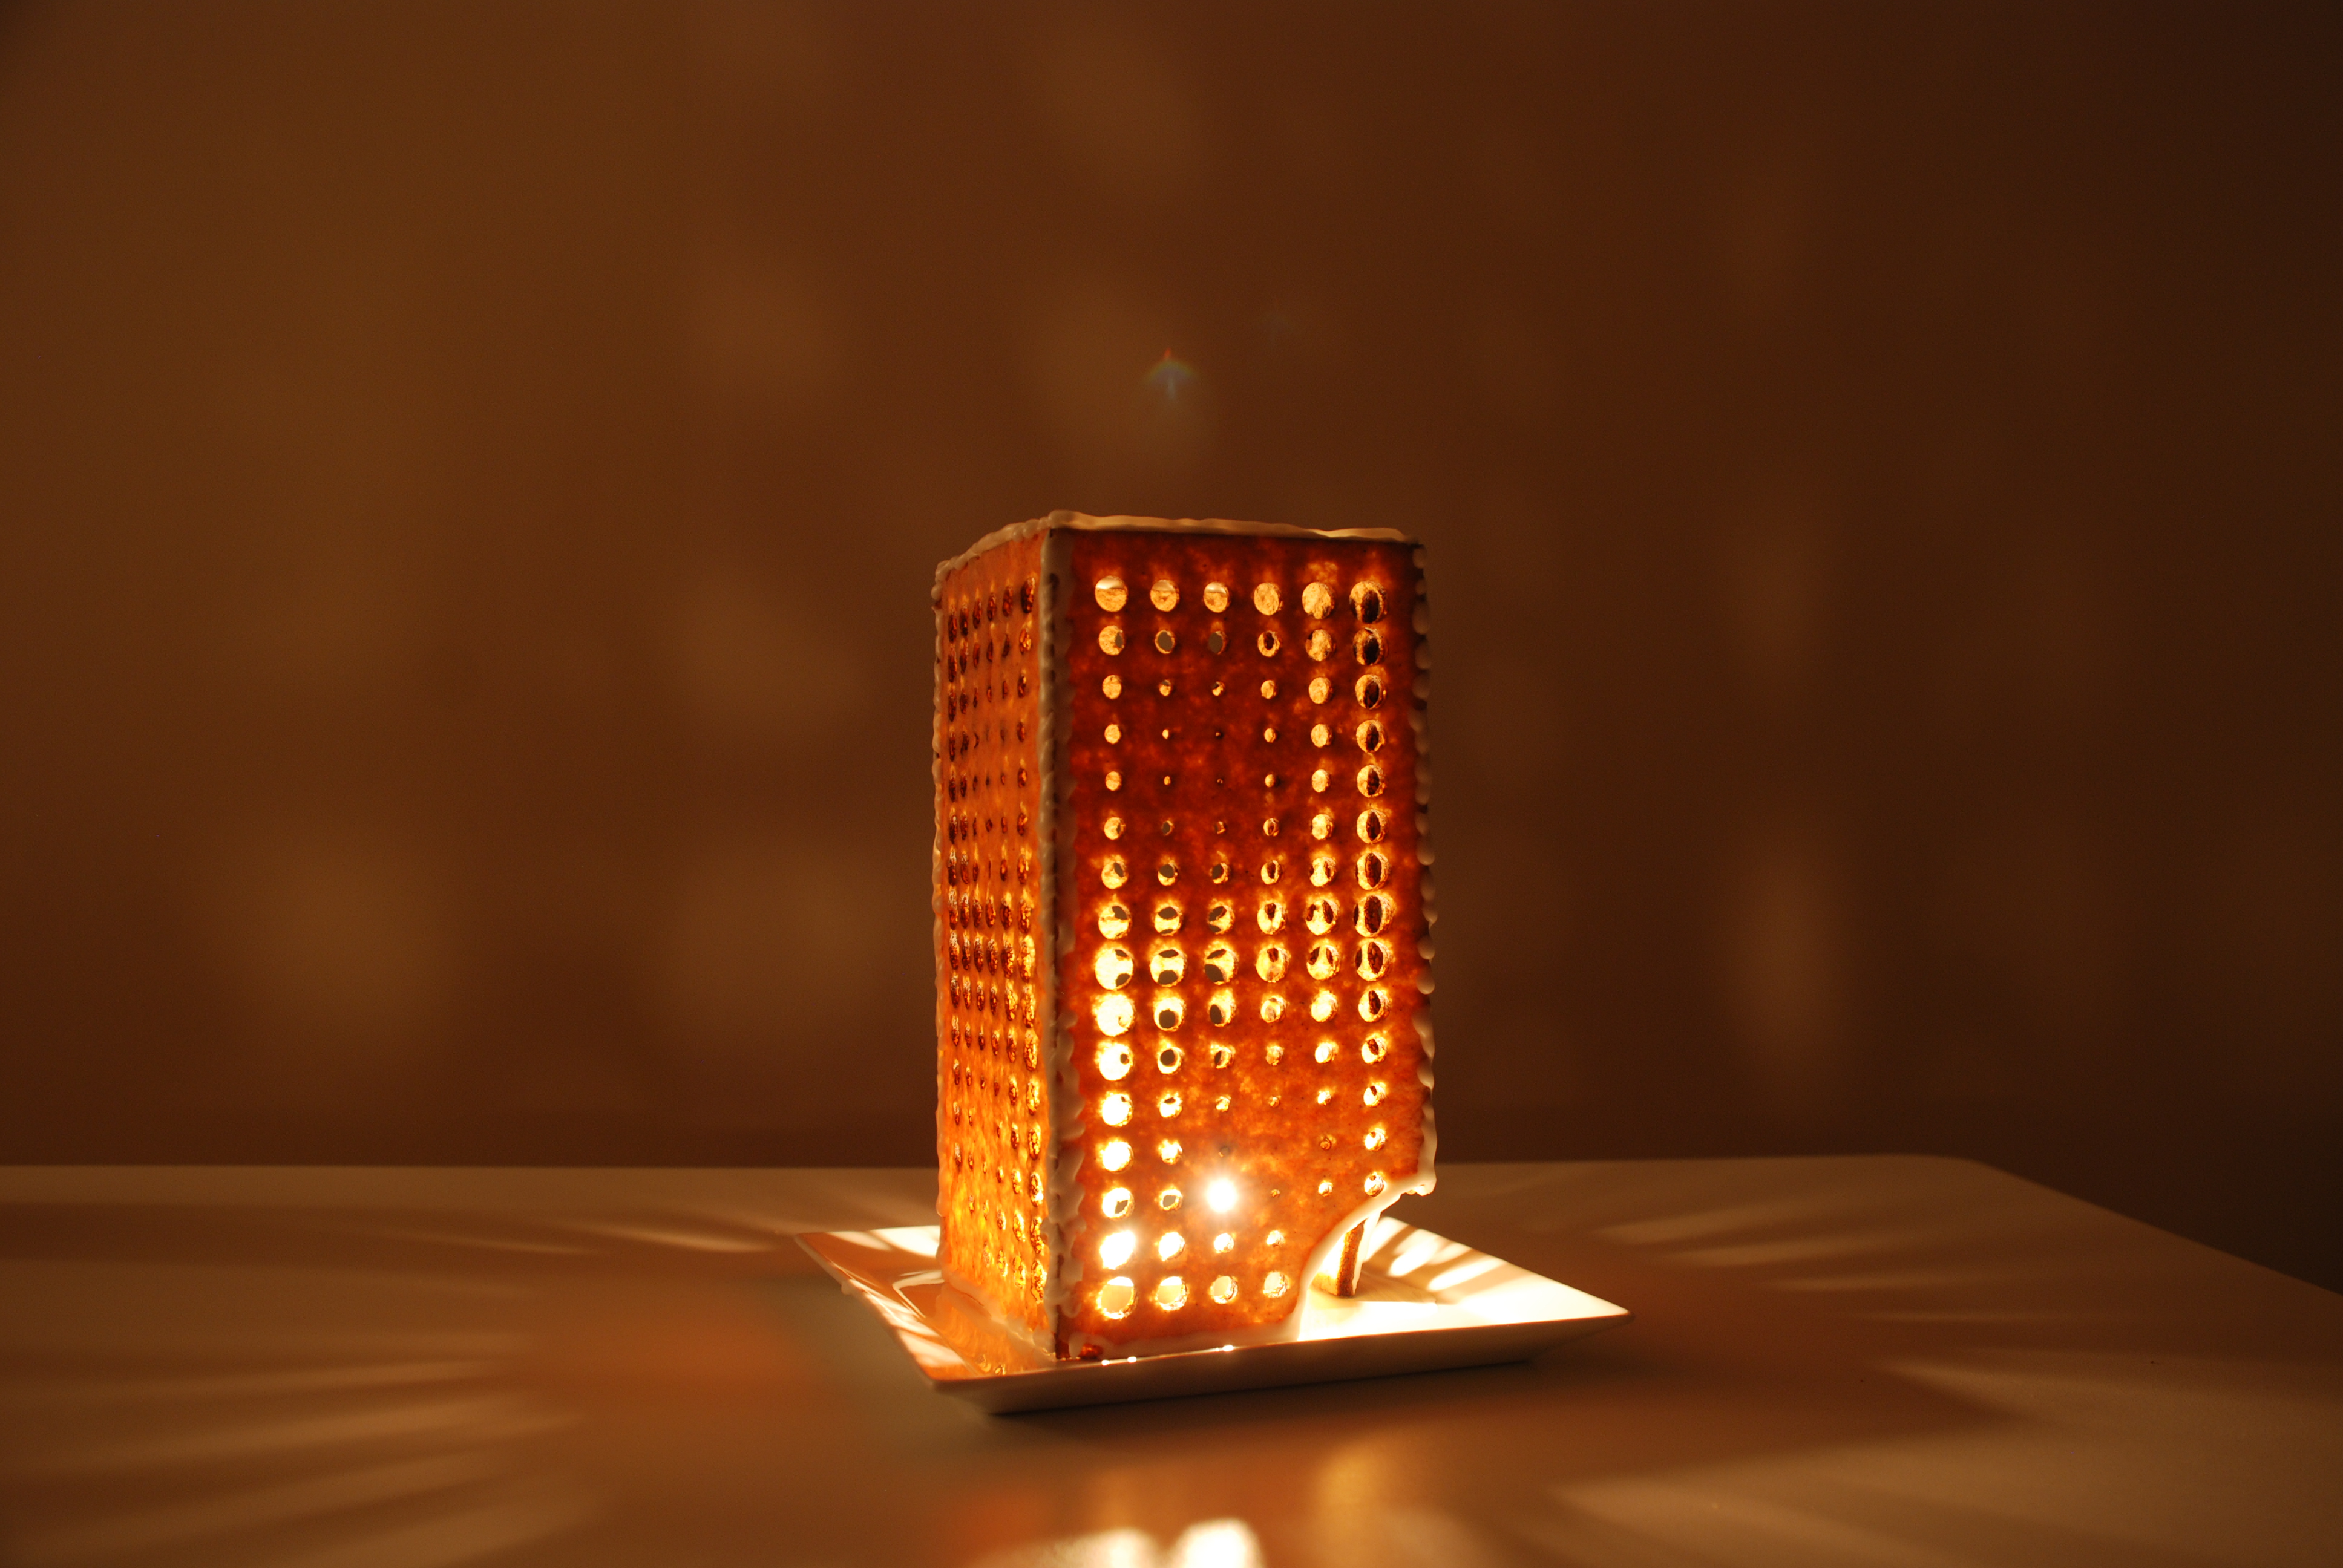
Step 4: Assembly
Conclusion
Despite the smell of burned gingerbread, the results of my first lasercutted gingerbread is promising. Next year I will take it to the next level so stay tuned. Merry Christmas!!