Case study #3 Part B: Exterior cladding

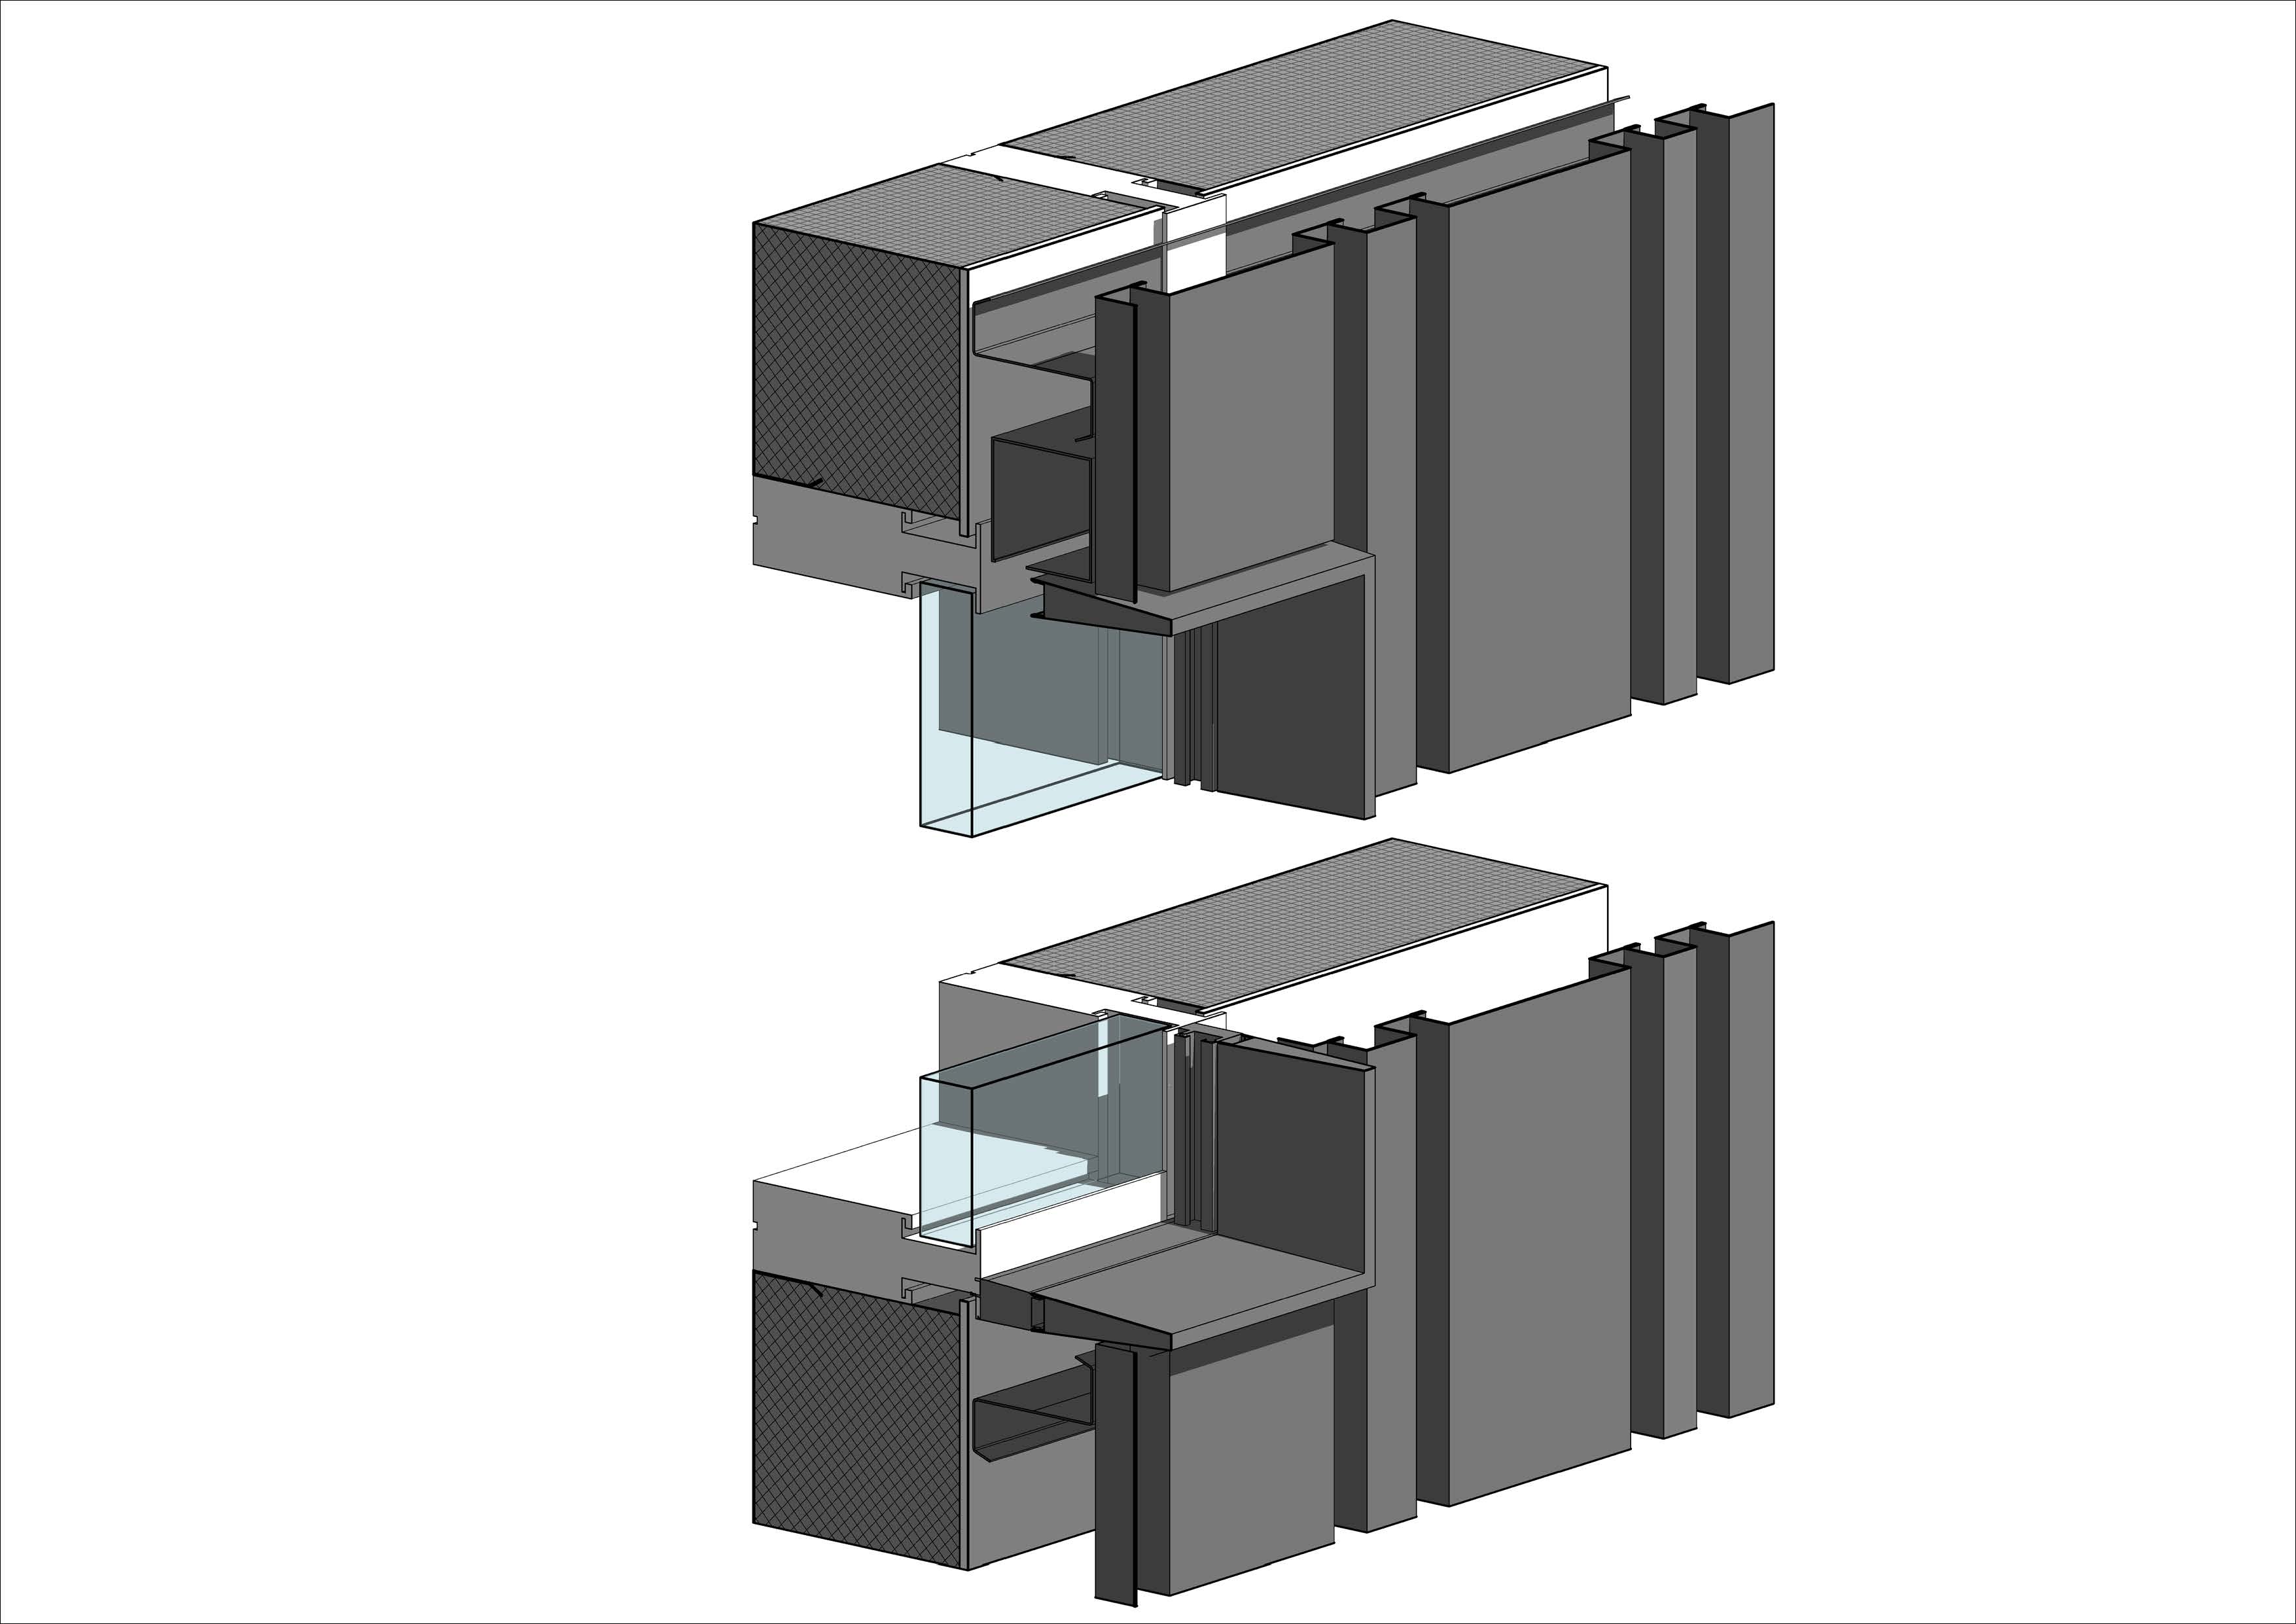
Okay, let us talk about the exterior cladding.

type type_3d

It is made of aluminum plates with two different sets of profiles (see picture above). These two different profiled plates are mounted one after the other, and since the module is 2400 mm and the width of every plate is 600 mm, there will be two plates of each type on every module.

position position_3d

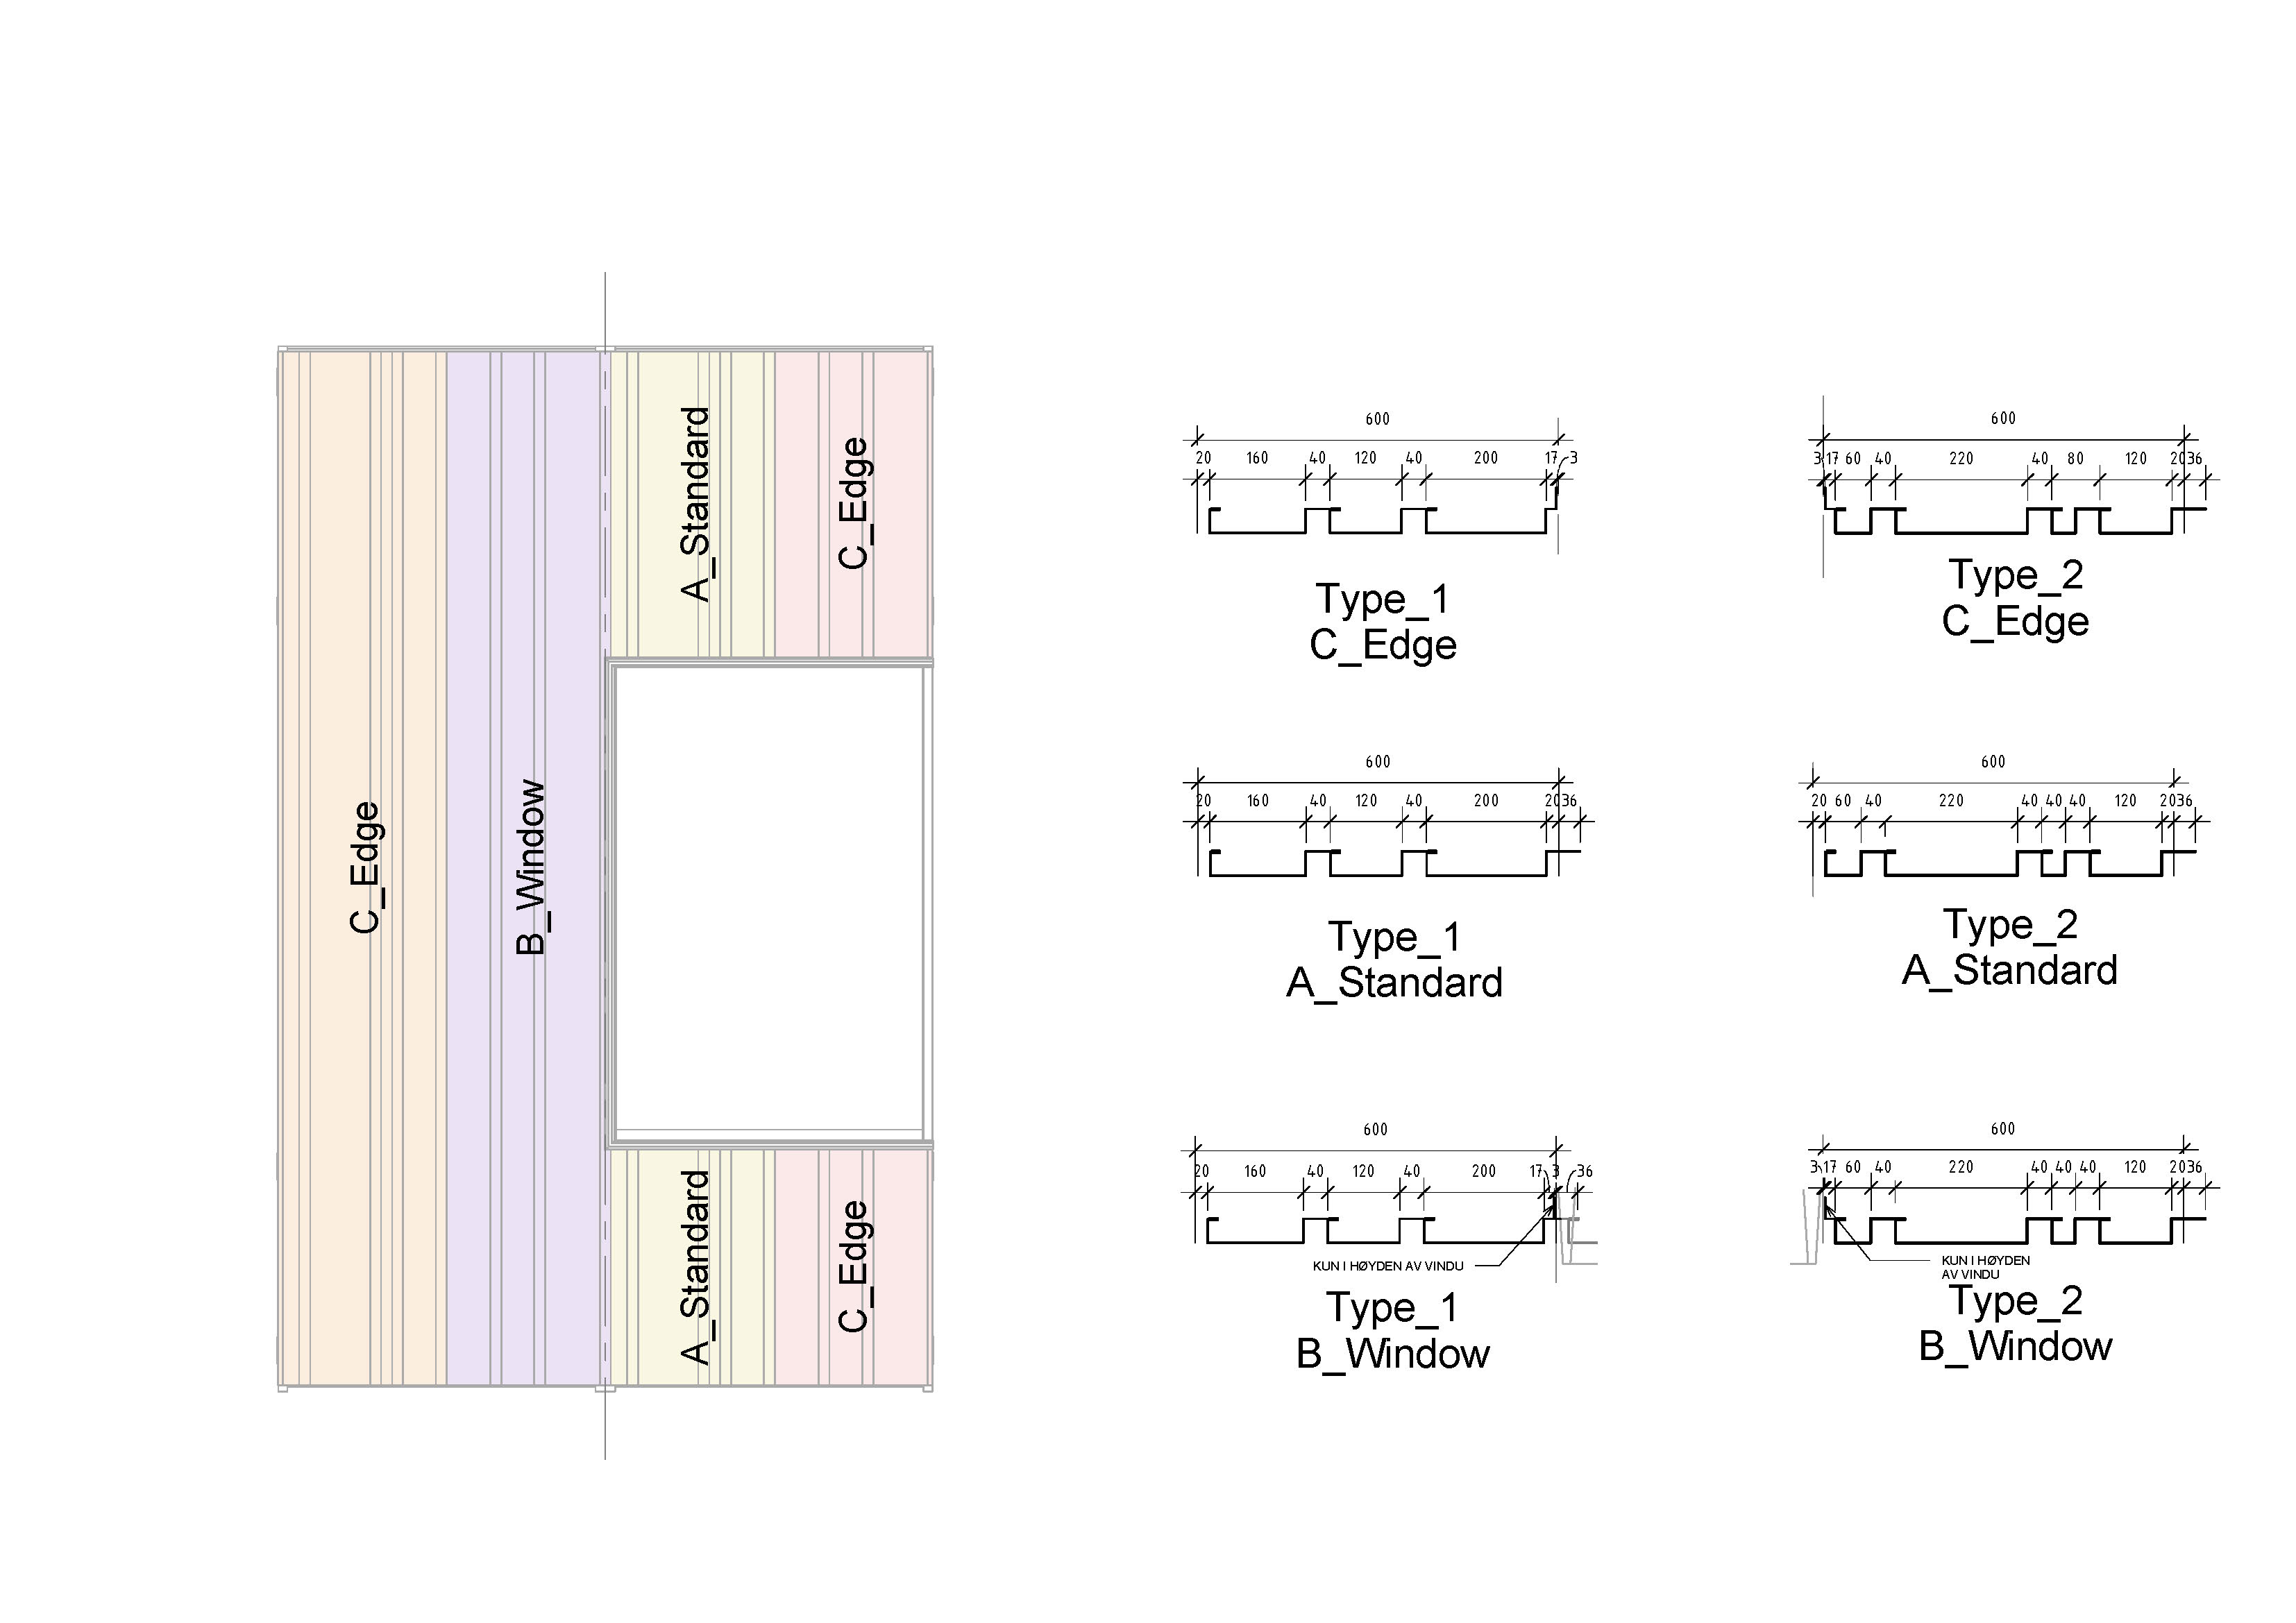
Within every module, the aluminum plates are either on the border of the module, towards a window or towards another plate. These three different positions have an impact on how the edges of the two different plates will be (see picture above).

I have made these two profiled plates as two different curtain wall panel families in Revit for various reason. One of the reason is that sometimes the width is less than 600 mm, and then I want to keep either the left or the right side of the curtain wall panel in a fixed position.This will avoid the position of the profiled plates from shifting from each other (this is illustrated in the video).

plate_2

The two curtain wall panels is basically made in the same way that I demonstrated in «Family training#1 -CWpanel with array» but in a slightly more complex way. The reason that I can’t do it in the same way, is that I need this family to be 100 % accurate due to production. I can’t simply divide the width of the curtain wall panel with the width of the profiles since this will be to inaccurate. Therefore I have added a little new flavor into the family, and that is a couple of «IF» statements and a profile that can varies between the profile closest to the curtain wall grid (see picture above).

count

In this way I can simply make a schedule that counts every family and types, combined with height and width parameter, and voilà. You are close to production.  

Case Study#3 Part A: A modular facade in Revit

F16_B

We are working on a project where the facade will be a prefabricated modular facade, where the  modules will arrive at the construction yard ready to be mounted on to the slabs. Since the modules contains everything from exterior cladding, exterior shading,  insulation, interior wall cladding, there will be no need to do anything more with the facade after every module have been mounted.

The reduced construction time at the construction yard is one of the reason it is getting more and more popular with prefabricated modular facades. It is also getting increasingly popular because of reduced cost and increased precision.

Modul_akso_oppbygning

There are many ways of modeling a modular facade in Revit, and it varies from project to project. In this project I have used a lot of Curtain Walls and Groups, which has some pros and cons. I will divide this Case Studie in multiple parts, where this part will cover the general principles of model with groups.

konsept

 The width of each module is 2400 mm and the height is in 3800 mm. This will give the facade a modular grid. You should try to have as few types of modules as possible since the amount of different modules usually will have a cost effect. Sometimes you have to balance the amount of different types of modules with the amount of flexibility. But not always. This is specially important in the early stages of the project, because if you can’t keep it simple in the start you may end up with a to «complex» end result.

FN16_moduler

Every module type is one group. so if you have 10 different types of modules you will have 10 different types of groups. Some tips using groups:

  • Keep the amount of groups down to a minimum. The illustration above shows you that in the finale phase of your project, you will have many different groups. . The more groups you have, the more you have to maintain. BUT, you should never stop doing what you want to do with your project because you don’t want to make more groups…
  • Group origin. One of great thing of using groups, is that you can change one group with another to test different concepts. To be able to do this, every group has to have the same group origin
  • Disallow join. The groups are going to be stacked together, and you don’t want your walls within a group to  magically join with the neighbor group. Therefor,disallow join as much as possible
  • How to keep track of your groups. Check this blog to get you started: http://autodesk-revit.blogspot.no/2013/05/scheduling-apartments.html. It’s not a perfect solution but it works

Modul_akso

Modul_C_utsnitt

In this facade I almost only uses Curtain Walls with different Curtain Wall Panels and Mullions. I will explain this in depth in my next blog post.

Modul_C

Remember, all the hard work you are using modeling your facade in 3D, you will be able to harvest directly from your model to production drawings. And that is a great feeling!

Stay tuned for part 2!